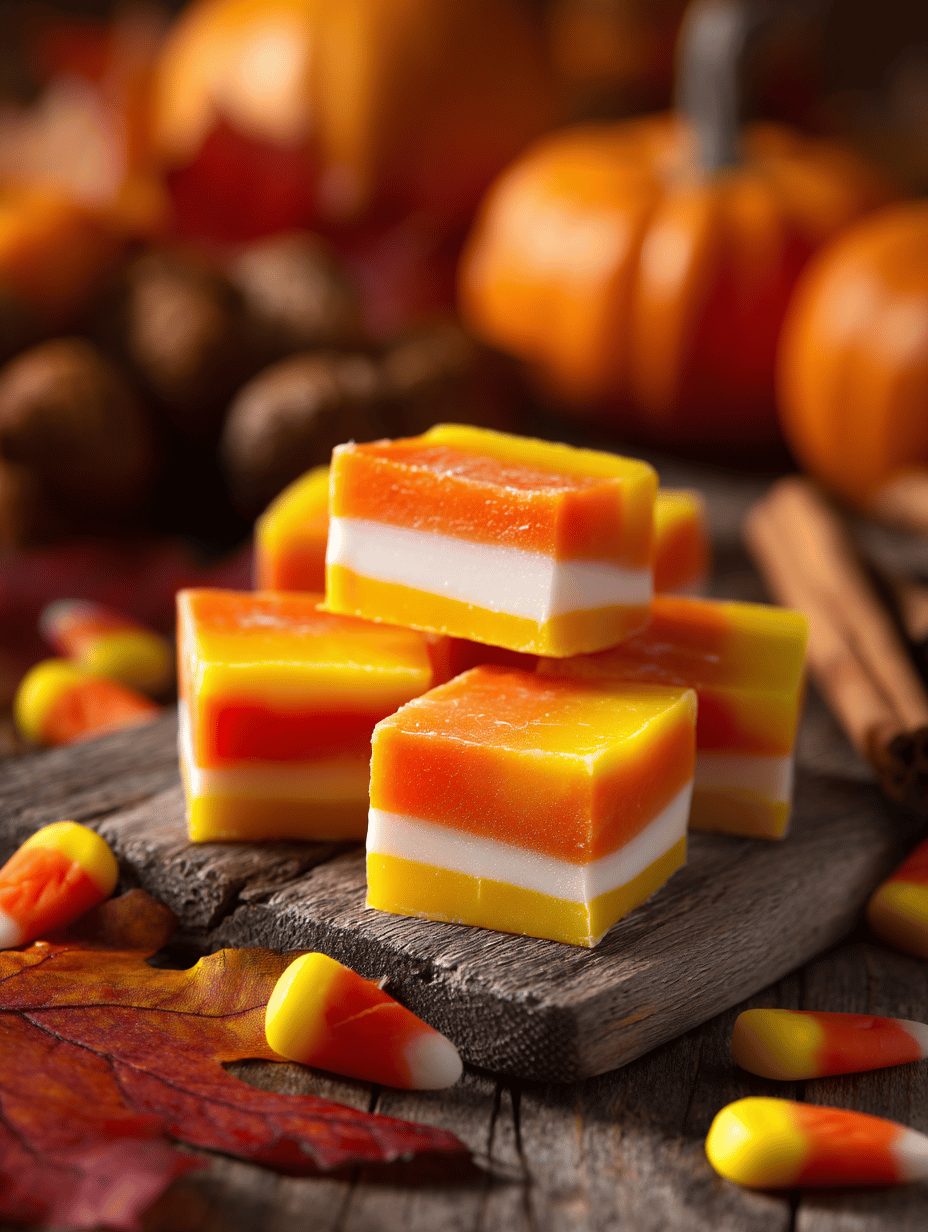
Candy corn fudge is one of those recipes that sneaks up on you. It’s a simple candy that turns into something unexpectedly decadent and satisfying. I love making it around fall because it feels like a little edible celebration of the season’s colors and flavors.
The best part? It’s quick, doesn’t require fancy ingredients, and the end result looks as cheerful as a basket of autumn leaves. Plus, it’s one of those recipes that invites a bit of chaos in the kitchen—melting, mixing, and pouring—before you get to enjoy the sweet reward.
Why I Keep Coming Back to This Fudge
It’s a quick batch that delivers big nostalgic feels, perfect for busy fall days. The candy corn’s playful texture and vibrant colors make it a hit for friends and family. Plus, it’s forgiving—mess it up slightly and you still end up with something sweet and satisfying.
The Building Blocks of Candy Corn Fudge
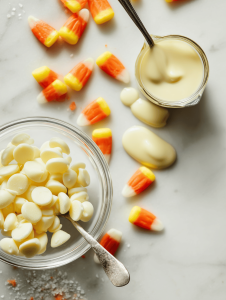
- White chocolate chips: They melt into a smooth, creamy base that’s sweet and rich. Swap for white baking chocolate if you prefer a less sweet option.
- Sweetened condensed milk: Adds sweetness and helps everything meld together. You can try evaporated milk for a lighter version.
- Candy corn: The star, chewy and colorful, with a buttery vanilla flavor. Mix in mini marshmallows for extra gooeyness.
- Vanilla extract: Enhances sweetness and depth. Almond extract can be a fun twist if you like a nutty aroma.
- Salt: Balancing element to temper the sweetness, bringing out flavors.
Tools You Need for Perfect Candy Corn Fudge
- Heavy-bottomed saucepan: To melt the chocolate smoothly without scorching.
- Rubber spatula: To stir the mixture and scrape every bit from the pan.
- 20cm (8-inch) square pan: To set and cut the fudge into perfect squares.
- Parchment paper: To prevent sticking and make removal easy.
Step-by-Step to Sweet, Chewy Candy Corn Fudge
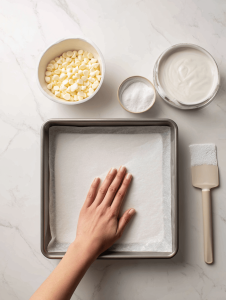
Step 1: Line a 20cm (8-inch) square pan with parchment paper, leaving some overhang.
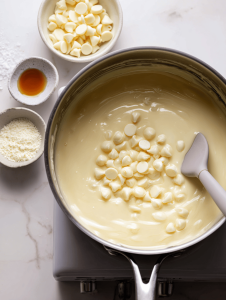
Step 2: In a heavy-bottomed saucepan, combine 2 cups of white chocolate chips and 1 cup of sweetened condensed milk.
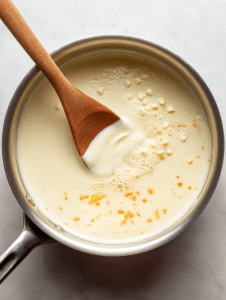
Step 3: Heat over low, stirring constantly, until the mixture is smooth and shiny, about 5 minutes.
Step 4: Add 1 teaspoon of vanilla extract and a pinch of salt, stir to combine.
Step 5: Fold in 1 cup of candy corn, ensuring they are evenly distributed.
Step 6: Pour the mixture into the prepared pan, smoothing the top with a spatula.
Step 7: Let it sit at room temperature for 30 minutes, then refrigerate for at least 2 hours, until firm.
Step 8: Once set, lift the fudge out using the parchment overhang and cut into squares.
Cooking Checks and Tips to Nail the Texture
- Ensure your mixture is smooth and glossy before pouring—lumps mean it’s not fully melted.
- The fudge should jiggle slightly when gently shaken—if it’s wobbly, it needs more chilling.
- Watch the color—once the white chocolate is fully melted, it should be shiny and uniform.
Common Mistakes and How to Fix Them
- Too high heat or lack of stirring.? FUDGE IS GRAINY—Stir constantly and keep heat low.
- Insufficient chilling time.? Fudge is too soft—Chill longer or add a bit more chocolate.
- Over-mixing or stirring too vigorously.? Candy corn sinks—Fold gently to keep pieces suspended.
- Overworking the mixture.? Surface cracks—Avoid over-melting or over-stirring after removing from heat.
Candy Corn Fudge
Ingredients
Equipment
Method
- Line your square pan with parchment paper, leaving some overhang on the sides for easy removal.
- Combine the white chocolate chips and sweetened condensed milk in a heavy-bottomed saucepan.
- Heat over low heat, stirring constantly, until the mixture is smooth, shiny, and fully melted—about 5 minutes. You’ll hear a gentle bubbling and see the mixture turn creamy.
- Stir in the vanilla extract and a pinch of salt, blending well until evenly incorporated.
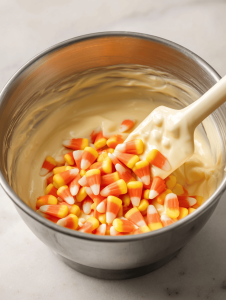
- Gently fold in the candy corn, making sure they’re evenly distributed throughout the mixture. It will look colorful and slightly sticky.
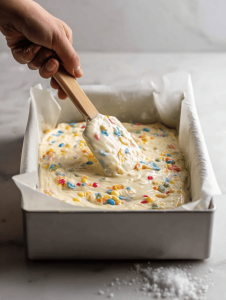
- Pour the mixture into the prepared pan, using a spatula to spread it out into an even layer. The surface should be smooth and glossy.
- Let the fudge sit at room temperature for about 30 minutes, allowing it to cool slightly before refrigerating.

- Refrigerate for at least 2 hours until the fudge is firm and set. It should feel solid and give a slight jiggle when gently shaken.
- Use the overhang to lift the fudge out of the pan, then cut into squares with a sharp knife for clean edges.
- Serve the squares on a plate, revealing the colorful, chewy candy corn nestled within a shiny, creamy base.
Notes

Hi, I’m Lucas Foster, the cook, writer, and everyday food enthusiast behind Totally in the Zone. This space is where my love for cooking meets my belief that food should fit into real life. Not rushed. Not overcomplicated. Just thoughtful, satisfying, and made with intention.