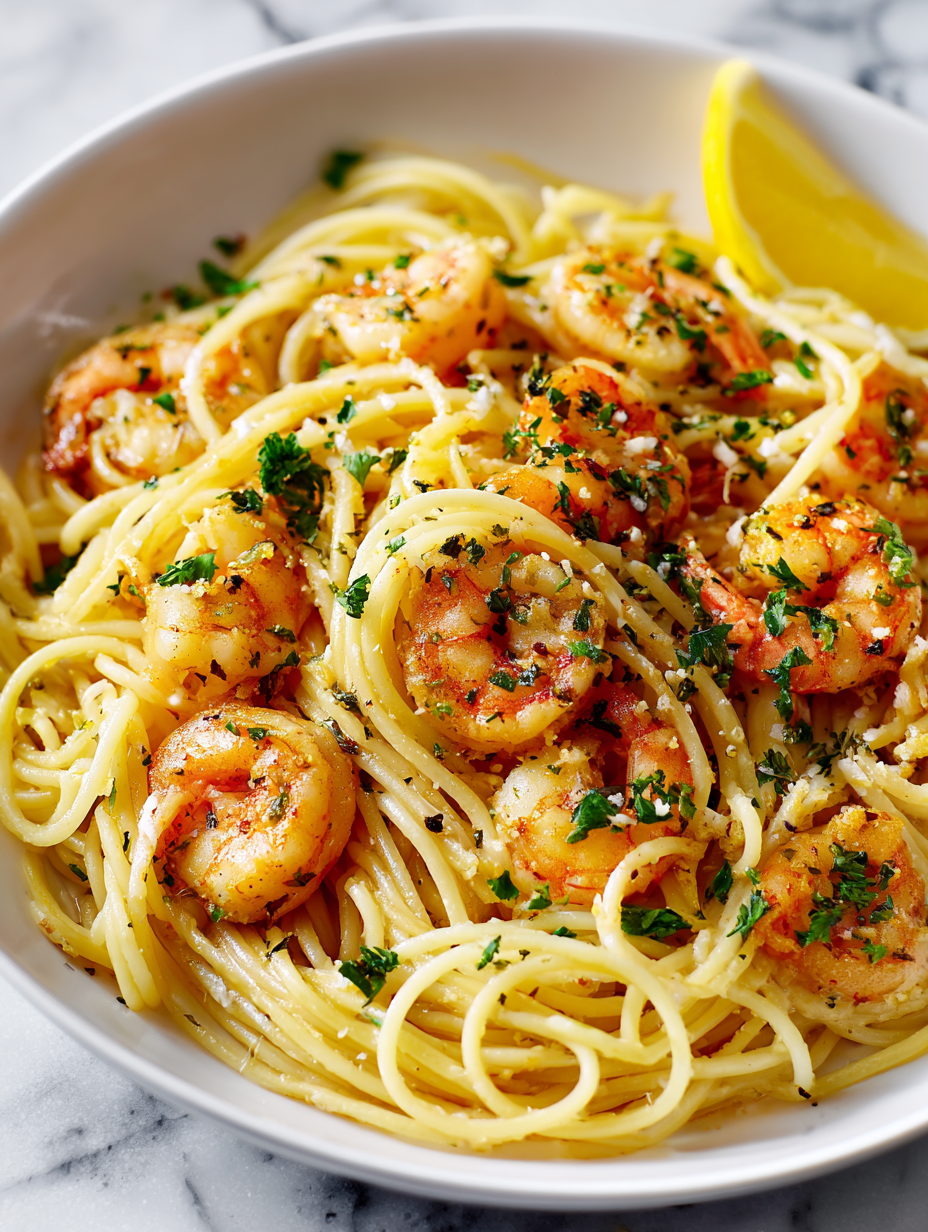
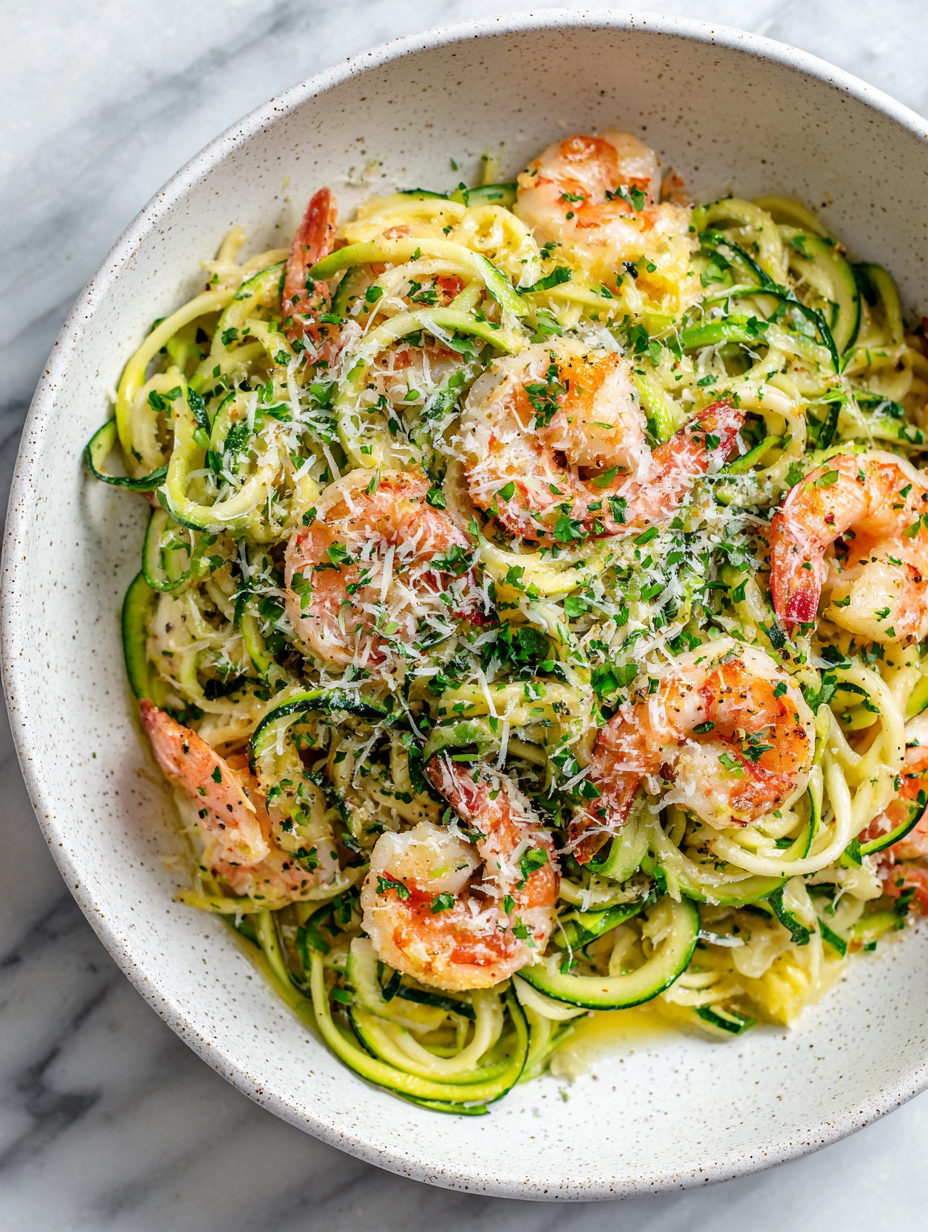
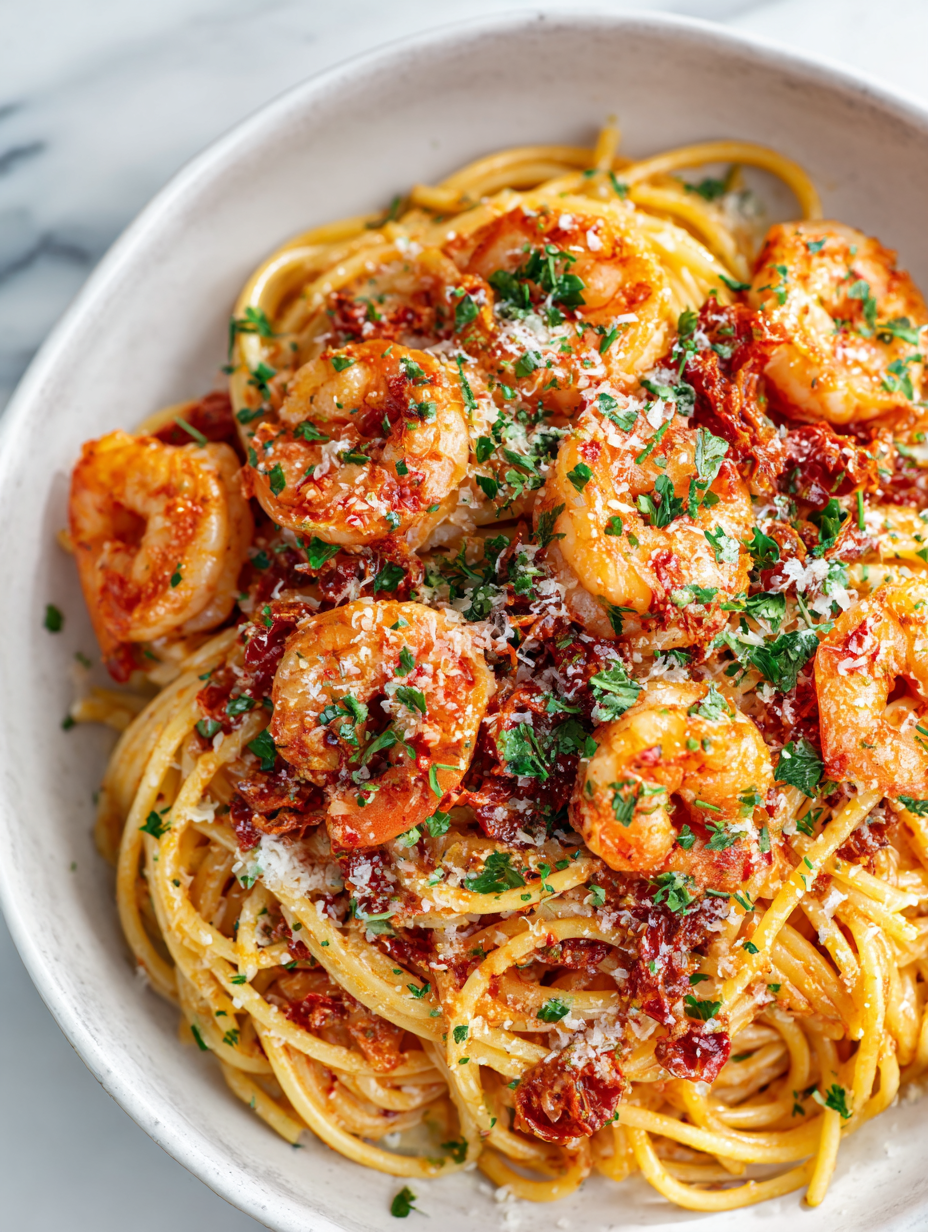
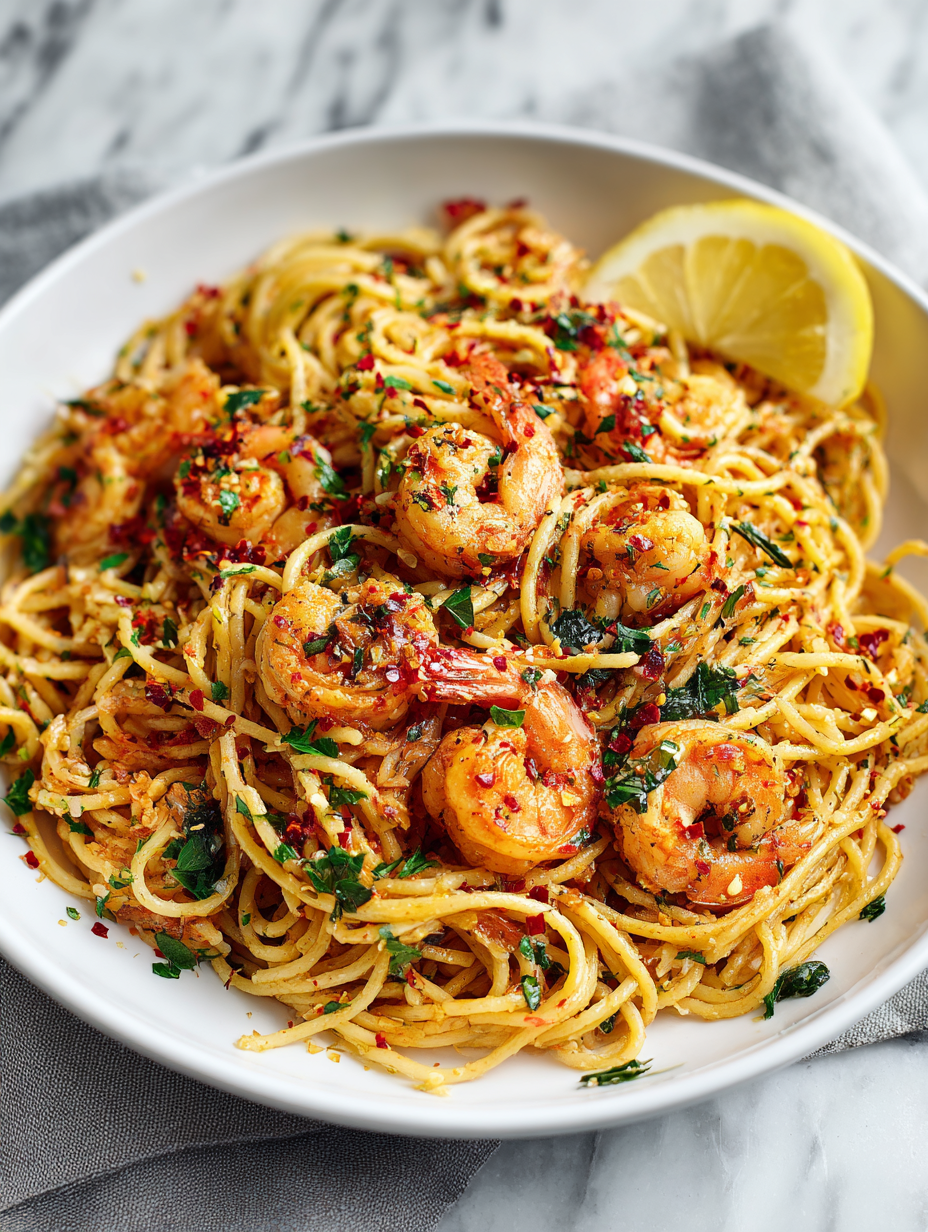
Category: Main Course

  • Mummy Hot Dogs: A Nostalgic Twist on a Childhood Classic

    Mummy Hot Dogs: A Nostalgic Twist on a Childhood Classic

    Mummy hot dogs are a childhood favorite with a fun, spooky makeover. I love how a simple dough wrap can turn into a creepy little creature, perfect for Halloween or a quick snack. It’s a recipe that’s almost too easy, but the results always get a giggle or two. Plus, they’re a guaranteed hit with kids and adults alike.

    Why I keep making these creepy snacks

    They’re quick, fun, and evoke childhood memories. Plus, the reaction from kids when they see the ‘mummies’ is priceless. It’s a simple recipe that still feels a bit special, especially during spooky season or last-minute gatherings. No matter how often I make them, they always bring a smile.

    What’s inside these spooky bites?

    • Hot dogs: The base, juicy and salty, needs a good snip to make it look like a wrapped mummy.
    • Crescent roll dough: Easy to work with, flaky, and golden when baked — the perfect mummy wrapping.
    • Ketchup and mustard: Classic condiments that double as ‘eyes’ and dipping sauces, adding brightness and zing.
    • Egg wash (optional): Gives that glossy, professional finish, but you can skip if you’re in a rush.
    • Black sesame seeds or peppercorns (for eyes): Small, dark, and perfect for tiny ‘eyes’ that pop against the dough.

    Tools of the mummy trade

    • Baking sheet: To hold the hot dogs while baking and ensure even heat.
    • Parchment paper: Prevents sticking and makes cleanup easier.
    • Knife: To cut slices into the hot dogs and dough.
    • Pastry brush (optional): To lightly brush dough with egg wash for extra shine.

    Step-by-step to mummy magic

    Step 1: Preheat your oven to 200°C (390°F).

    Step 2: Line a baking sheet with parchment paper for easy cleanup.

    Step 3: Cut slices into the hot dogs, about halfway down, to create a mummy bandage effect.

    Step 4: Wrap strips of crescent roll dough around the hot dogs, leaving gaps for ‘eyes.’

    Step 5: Place the wrapped hot dogs on the baking sheet, seam side down.

    Step 6: Bake for 12-15 minutes until golden and crispy.

    Step 7: While baking, mix ketchup and mustard for dipping.

    Step 8: Once out of the oven, add small dots of mustard or ketchup for ‘eyes.’

    Step 9: Serve warm with your favorite sides.

    Cooking checkpoints to keep in mind

    • Ensure the dough is golden and crispy, not pale.
    • Hot dogs should be steaming hot inside, check with a quick temp test.
    • Eyes should be visible and slightly raised for a spooky effect.

    Common mummy mishaps and how to fix them

    • Hot dough or undercooked hot dogs.? Use too much dough → Use less for a more authentic mummy look.
    • Dough not crispy enough.? Bake longer or at higher temp → Keep an eye on baking time and color.
    • Eyes fall off after baking.? Eyes not sticking → Use a tiny dab of mustard or ketchup as glue.
    • Appearance gets messy.? Dough tears or shrinks → Roll dough evenly and don’t overstuff.

    Mummy Hot Dogs

    Mummy hot dogs are a fun, spooky snack perfect for Halloween or kids’ parties. Juicy hot dogs are sliced and wrapped in flaky crescent roll dough, then baked until golden and crispy, with playful ‘eyes’ added for a creepy touch. The result is a crispy, flaky, and playful treat that looks like tiny mummies, sure to amuse both kids and adults.
    Prep Time 10 minutes
    Cook Time 15 minutes
    Total Time 25 minutes
    Servings: 4
    Course: Main Course
    Cuisine: American
    Calories: 250

    Ingredients
      

    • 4 pieces hot dogs Juicy and salty, the base for the mummies
    • 1 can crescent roll dough Pre-cut dough for easy wrapping
    • 2 tbsp ketchup For dipping and eyes
    • 2 tbsp mustard Optional for eyes and dipping
    • small black sesame seeds or peppercorns For tiny ‘eyes’
    • 1 egg egg Optional for egg wash to give a glossy finish

    Equipment

    • Baking sheet
    • Parchment paper
    • Knife
    • Pastry brush

    Method
     

    1. Preheat your oven to 200°C (390°F) and line a baking sheet with parchment paper.
    2. Lay the crescent roll dough on a clean surface and gently unroll it; cut the dough into strips about 1/4 inch wide.
    3. Using a knife, make shallow slices halfway down each hot dog, creating a wrapped effect that looks like bandages.
    4. Wrap strips of the crescent dough around each hot dog, leaving small gaps for the eyes to peek through.
    5. If desired, lightly brush the wrapped hot dogs with beaten egg using a pastry brush for a shiny finish.
    6. Place the wrapped hot dogs seam-side down on the prepared baking sheet, spacing them evenly.
    7. Bake in the preheated oven for 12-15 minutes, until the dough is golden brown and crispy.
    8. While baking, prepare the ‘eyes’ by placing small dots of ketchup or mustard on each hot dog for the pupils.
    9. Once out of the oven, carefully place tiny black sesame seeds or peppercorns on the ketchup or mustard dots to complete the spooky eyes.
    10. Serve the mummy hot dogs warm with your favorite dipping sauces and enjoy their playful, crispy texture.

    Notes

    For a shiny finish, brush with an egg wash before baking. Be sure to watch the baking time to prevent over-browning. Use a small dab of mustard or ketchup to attach the eyes securely.
    These mummy hot dogs are a perfect mix of fun and comfort, especially for a quick family snack or a spooky-themed party. They bring a playful twist to a simple ingredient and turn it into something memorable. Feel free to experiment with different fillings or toppings to make them your own. Don’t rush—enjoy the process and the smiles that come with them.

  • Spooky Fun with Halloween Pizza: A Playful Twist on Classic Comfort

    Spooky Fun with Halloween Pizza: A Playful Twist on Classic Comfort

    I’ve always loved turning food into a little story or a surprise, and Halloween offers the perfect excuse. This pizza is my way of blending comfort with a dash of chaos—no fancy tricks, just playful ingredients and a bit of messy fun. It’s about making something familiar feel a little wild, a little festive, and totally shareable.

    Why I Keep Coming Back to This Halloween Pizza

    It’s a perfect blend of simplicity and playful chaos. I love how a basic dough transforms into a spooky masterpiece, and it always makes my family smile. Plus, it’s quick enough to whip up last minute, yet fun enough to feel special. Every time I make it, I get a little nostalgic about childhood Halloweens, but with a grown-up twist.

    Ghoulish Goodies: Ingredients and Their Secrets

    • Pizza dough — I love a chewy, slightly sour base, but store-bought works fine if you’re in a pinch.: A good stretch is key, so let it sit at room temp before shaping.
    • Tomato sauce — Bright, tangy, with a hint of garlic. Swap in pesto for a green, herby twist.: Spread thinly to avoid sogginess.
    • Mozzarella — Melty, gooey, with a mild flavor that melts into the toppings.: Fresh or low-moisture works, just shred it well.
    • Black olives — Oozing with salty, smoky flavor, perfect for spooky eyes.: Slice thin for easy placement.
    • Orange bell pepper — Sweet, crisp, and vibrant, adds a cheerful pop of color.: Slice into tiny triangles or strips.
    • Pepperoni or salami — For that jagged, fiery grin, spicy and crispy when baked.: Cut into shapes or uneven pieces for a messy look.
    • Fresh herbs — Basil or parsley, chopped for finishing touches.: Adds fresh aroma and a burst of flavor.

    Tools of the Trick: What You Need for Halloween Pizza

    • Pizza stone or baking sheet: Provides a hot surface for a crisp crust.
    • Rolling pin or hands: Helps stretch the dough evenly.
    • Sharp knife or scissors: For cutting toppings and decorating.
    • Pastry brush (optional): For brushing the crust with oil or egg wash.
    • Cooling rack: To rest the pizza and prevent sogginess.

    Step-by-step: Crafting a Halloween-Themed Pizza

    Step 1: Preheat your oven to 220°C (430°F).

    Step 2: Stretch the pizza dough on a floured surface into a rough rectangle, about 30×20 cm.

    Step 3: Spread a thin layer of tomato sauce over the dough, leaving a 1-inch border.

    Step 4: Sprinkle shredded mozzarella evenly, then add sliced black olives for eyes and a small orange bell pepper for a nose.

    Step 5: Use pepperoni slices or salami for a jagged smile, arranging them like a crooked grin.

    Step 6: Bake on a preheated baking sheet or pizza stone for 12-15 minutes until the crust is golden and the cheese is bubbly.

    Step 7: Remove from oven and let sit for 5 minutes. Decorate with chopped herbs, if desired.

    Step 8: Slice and serve while warm, with extra toppings like chili flakes or fresh basil.

    Cooking Checks & Tips to Keep Your Halloween Pizza Perfect

    • Check that the crust is golden and crisp around the edges.
    • Ensure the cheese is bubbly and slightly browned on top.
    • The toppings should look vibrant, not dried out or burnt.
    • Use a probe thermometer to confirm the pizza’s internal temp reaches 75°C (165°F).

    Common Spook-ups & How to Fix Them

    • Burnt edges from too high heat or too long.? OVER-TORCHED CRUST — Lower oven temperature to 200°C (390°F) and bake for less time.
    • A soggy crust from inadequate preheating.? SOGGY BASE — Use a preheated pizza stone or ensure oven is very hot before baking.
    • Toppings falling off when slicing.? TOPPINGS SLIDING OFF — Use a light hand with toppings and press them into the cheese.
    • Cheese remaining unmelted or stringy.? CHEESE NOT MELTING — Cover with foil if cheese browns too quickly.

    Halloween Spooky Pizza

    This playful Halloween pizza features a chewy, slightly sour dough base topped with vibrant tomato sauce, melted mozzarella, and fun spooky toppings like black olives, orange bell peppers, and pepperoni arranged in a mischievous grin. The final appearance is a cheesy, golden crust with spooky face details, delivering a crispy texture with gooey, melty toppings that make for a festive, shareable dish.
    Prep Time 15 minutes
    Cook Time 15 minutes
    Total Time 30 minutes
    Servings: 4
    Course: Main Course
    Cuisine: American
    Calories: 350

    Ingredients
      

    • 1 roll store-bought pizza dough bring to room temperature for easier stretching
    • 1/2 cup tomato sauce spread thin to avoid sogginess
    • 1 cup shredded mozzarella preferably fresh or low-moisture
    • 6 pieces black olives sliced thin for spooky eyes
    • 1/2 cup orange bell pepper sliced into tiny triangles or strips
    • 8 slices pepperoni or salami cut into shapes or uneven pieces for a messy grin
    • a handful fresh herbs (basil or parsley) chopped for finishing touches

    Equipment

    • Oven
    • Baking sheet or pizza stone
    • Rolling pin or hands
    • Sharp knife or scissors
    • Pastry brush (optional)
    • Cooling rack

    Method
     

    1. Preheat your oven to 220°C (430°F). Place a baking sheet or pizza stone inside to heat up.
    2. Gently stretch the pizza dough on a floured surface into a rectangle about 30×20 cm, giving it a relaxed, rustic shape. Let it sit for a minute if it resists stretching.
    3. Transfer the stretched dough onto a piece of parchment or your hot baking surface if using a pizza stone. Spread a thin layer of tomato sauce over the surface, leaving about a 1-inch border around the edges.
    4. Sprinkle shredded mozzarella evenly across the sauce, making sure to cover the entire surface for a gooey, cheesy base.
    5. Use a sharp knife or scissors to cut thin slices of black olives, then arrange two for eyes near the top of the pizza.
    6. Place small pieces of orange bell pepper in the center to form a nose, adding a splash of bright color.
    7. Arrange pepperoni slices or salami in a crooked smile shape across the lower part of the pizza to mimic a spooky grin.
    8. Carefully slide the pizza onto your preheated baking surface and bake for 12-15 minutes, until the crust is golden and crispy, and the cheese is bubbly.
    9. Remove the pizza from the oven and let it rest for 5 minutes on a cooling rack, which helps prevent sogginess and makes slicing easier.
    10. Sprinkle chopped fresh herbs over the top for a burst of aroma and a final touch of freshness.
    11. Slice the pizza into pieces, revealing the cheesy, colorful, spooky face, then serve while warm for a fun Halloween feast.

    Notes

    For extra fun, you can add chili flakes for heat or extra herbs for more flavor. Using a pizza stone enhances crispiness, but a baking sheet works perfectly too.
    This pizza isn’t just about the spooky face; it’s about the joy of turning simple ingredients into something that sparks a little chaos and a lot of smiles. It’s perfect for a quick Halloween treat or a fun family project. Feel free to go wild with toppings—think edible eyes, green pesto, or even candy for a sweet surprise. Whatever you do, enjoy the messy, playful process and the cheesy, crispy results.

  • A Cozy Spin on Pumpkin Risotto: Embracing Autumn’s Heart in Every Bite

    A Cozy Spin on Pumpkin Risotto: Embracing Autumn’s Heart in Every Bite

    Pumpkin risotto is one of those dishes that feels both comforting and a little special. It’s perfect for when you want something warm and nourishing, but also a bit elegant. The pumpkin brings a subtle sweetness that balances the savory broth and cheese, making every bite feel like a cozy fall day.
    I love how adaptable it is—you can add herbs, a splash of cream, or even some crispy sage on top. It’s not fancy, just honest cooking that’s slow and thoughtful. Sometimes, that’s all a good meal needs.

    Why I keep making this pumpkin risotto.

    It’s about the slow, mindful process—each stir releases more flavor, and the aroma fills the kitchen with warmth. The balance of sweet pumpkin, savory cheese, and a hint of spice is endlessly satisfying. It feels like a little ritual that turns simple ingredients into something special, especially as the weather cools down. Plus, it’s forgiving enough to customize—more herbs, a splash of cream, or a handful of toasted seeds.

    Breaking down the key ingredients.

    • Pumpkin puree: Adds sweetness and vibrant color; use homemade or canned for convenience.
    • Arborio rice: Starchy rice that creates that luscious, creamy texture.
    • Vegetable broth: Gives depth; use homemade or store-bought, kept warm.
    • Parmesan cheese: Salty, umami-rich; grate fresh for best flavor.
    • Butter and olive oil: Foundation for sautéing and finishing; adds richness.
    • Nutmeg: A pinch of warm spice; enhances the pumpkin’s sweetness.
    • Garlic and onions: Builds flavor base; sauté until fragrant and translucent.

    Tools and equipment to help you along the way.

    • Large heavy-bottomed pan or skillet: Ensures even heat for sautéing and simmering.
    • Ladle: For adding warm broth gradually and stirring.
    • Wooden spoon: Gentle stirring without damaging the rice.
    • Measuring cups and spoons: Accurate ingredient measurement.
    • Grater: For fresh cheese and nutmeg.

    Step-by-step to a creamy, pumpkin-laden risotto that feels like a warm hug.

    Step 1: Gather your ingredients and tools before you start, so nothing interrupts the gentle simmering.

    Step 2: Warm up your broth and keep it just simmering; it’s the soul of this dish.

    Step 3: Sauté onions and garlic until translucent and fragrant, about 5 minutes on medium heat.

    Step 4: Add the pumpkin puree and cook for another 3 minutes, stirring constantly to prevent sticking.

    Step 5: Stir in arborio rice, coating each grain with oil, and toast lightly for 2 minutes.

    Step 6: Gradually add warm broth, one ladle at a time, stirring until absorbed before adding more.

    Step 7: Continue this process for about 20 minutes, until the rice is creamy and slightly al dente.

    Step 8: Finish with a generous knob of butter, grated cheese, and a pinch of nutmeg.

    Step 9: Let the risotto rest for 2 minutes before serving, uncovered.

    Step 10: Serve hot, with extra cheese and a drizzle of good olive oil.

    Cooking checkpoints to ensure your risotto turns out perfect.

    • The rice should be tender but still have a slight bite, not mushy.
    • The risotto should look creamy, not dry or soupy.
    • Smell a fragrant mixture of toasted rice, pumpkin, and garlic—this means it’s developing flavor.
    • The final texture should be velvety and slightly loose, not stiff or runny.

    Common mistakes and how to fix them.

    • Cooking on too high heat, risking burnt rice.? Use high heat initially to toast rice, then lower to simmer; don’t keep it on high.
    • Adding pumpkin too early or without stirring, causing clumps.? Stir constantly when adding pumpkin to prevent sticking.
    • Using cold broth, which halts the simmering process.? If broth gets cold, it will slow down cooking; keep it warm.
    • Adding too much broth at once, resulting in a soupy dish. ? Don’t rush the gradual addition of broth; patience makes creamier risotto.

    Pumpkin Risotto

    Pumpkin risotto is a creamy, comforting dish featuring tender arborio rice cooked slowly with savory broth, enriched with sweet pumpkin puree, Parmesan cheese, and a hint of nutmeg. Its velvety texture and vibrant color make it both a cozy and elegant meal, perfect for fall evenings. The process involves gradual stirring and building flavor, resulting in a luscious, slightly al dente risotto with a rich, harmonious taste.
    Prep Time 10 minutes
    Cook Time 30 minutes
    Total Time 40 minutes
    Servings: 4
    Course: Main Course
    Cuisine: Comfort Food
    Calories: 350

    Ingredients
      

    • 4 cups vegetable broth kept warm and simmering
    • 1 small onion finely chopped
    • 2 cloves garlic minced
    • 1 cup pumpkin puree homemade or canned
    • 1 1/2 cups arborio rice starchy rice for creaminess
    • 2 tablespoons butter
    • 1/2 cup Parmesan cheese freshly grated
    • 1/4 teaspoon nutmeg freshly grated or ground
    • 2 tablespoons olive oil

    Equipment

    • Large heavy-bottomed pan or skillet
    • Ladle
    • Wooden spoon
    • Measuring cups and spoons
    • Grater

    Method
     

    1. Gather all your ingredients and tools, ensuring your broth is kept warm on the stove.
    2. Heat a large heavy-bottomed pan over medium heat and add the olive oil. Once shimmering, add the finely chopped onion and cook until translucent and fragrant, about 5 minutes.
    3. Stir in the minced garlic and cook for another minute until it becomes fragrant, filling your kitchen with a warm aroma.
    4. Add the pumpkin puree and cook, stirring constantly, for about 3 minutes until it darkens slightly and blends with the onion and garlic.
    5. Pour in the arborio rice and stir well, coating each grain with the pumpkin mixture, then toast lightly for 2 minutes, listening for a gentle crackle and watching the rice become slightly translucent at the edges.
    6. Begin adding the warm broth, one ladleful at a time, stirring constantly. Wait until the liquid is mostly absorbed before adding the next ladleful, maintaining a gentle simmer.
    7. Continue this process, stirring regularly, for about 20 minutes, until the rice is tender yet slightly firm to the bite and the mixture is creamy and velvety.
    8. Remove from heat and stir in the butter, grated Parmesan cheese, and a pinch of nutmeg. Mix until everything is well combined and the risotto is rich and glossy.
    9. Let the risotto rest for 2 minutes, uncovered, to allow the flavors to meld and the texture to settle into a perfect velvety consistency.
    10. Give the risotto a final gentle stir, then serve hot, topped with extra Parmesan and a drizzle of good olive oil for added richness.
    Making pumpkin risotto isn’t just about the ingredients; it’s about the rhythm of stirring, the slow build of flavors, and the comfort that comes from a dish that’s been lovingly tended. Each spoonful should be velvety, with the sweetness of pumpkin balanced by the savory undertones. It’s a dish that demands patience, but rewards you with a taste of autumn in every bite. Feel free to tweak with herbs or spice—make it your own.

  • Black Bean Burgers: A Rustic, No-Fuss Take on a Classic Favorite

    Black Bean Burgers: A Rustic, No-Fuss Take on a Classic Favorite

    Black bean burgers have always seemed like a lazy, health-conscious option—until I started making them my way. It’s about embracing the rough edges, the imperfect shape, and the smoky aroma that fills the kitchen. This recipe is about simplicity, but with enough punch to make it stand out.

    I love that they’re forgiving, adaptable, and kind of a blank canvas. It’s a meal that feeds your hunger and your curiosity, with a bit of chaos tossed in. Sometimes, the best meals come from tossing a bunch of ingredients together and seeing what sticks.

    Why These Burgers Keep Coming Back

    They’re honest, straightforward, and forgiving. I keep returning because they remind me of lazy weekends and backyard cookouts, but with a flavor that surprises every time. It’s the kind of comfort food that doesn’t ask for perfect presentation, just good company and a hot skillet.

    Breaking Down the Key Ingredients

    • Black beans: The hearty base, they mash into a rustic, oozy texture that holds everything together.
    • Onion and garlic: Bring a sweet, pungent aroma that cuts through the richness of the beans.
    • Oats: They soak up moisture and act as a binder, giving the burger a chewy bite.
    • Egg: A natural binder that keeps the mixture cohesive, especially if you skip oats.
    • Smoky paprika: Adds a subtle, smoky depth and a splash of color.
    • Seasonings (salt, pepper, cumin): Layer in warmth and complexity, balancing the earthy beans.
    • Oil for frying: Helps achieve a crispy exterior and prevents sticking.

    Tools and Equipment for Black Bean Burgers

    • Mixing bowl: To combine and hold the burger mixture.
    • Frying pan or skillet: To cook the burgers evenly and develop a crispy crust.
    • Spatula: To flip and handle the burgers without breaking.
    • Measuring cups and spoons: For accurate ingredient portions.
    • Plate or tray: To rest the formed patties before cooking.

    Making Black Bean Burgers from Scratch – No Fancy Equipment Needed

    Step 1: Start by draining and rinsing a can of black beans. Mash them roughly with a fork, leaving some chunks for texture.

    Step 2: In a bowl, combine the mashed beans with finely chopped onion, garlic, and a splash of smoky paprika. Mix well.

    Step 3: Add an egg and a handful of oats to bind everything together. Season with salt, pepper, and a dash of cumin.

    Step 4: Form the mixture into thick patties, about 1.5 cm thick. Chill for 15 minutes to help them hold shape.

    Cooking Checkpoints and Tips for Perfect Burgers

    • The patties should be firm but not dry. If they crumble, add a bit more oats or an extra egg.
    • Cook over medium heat (about 160°C/320°F) to avoid burning the outside while keeping the inside moist.
    • Look for a deepening color and a slight crisp on the edges. They should be golden and firm to the touch.

    Common Mistakes and How to Fix Them

    • The patties fall apart during cooking.? Add a little more oats if the mixture feels too loose.
    • Burgers are charred on the outside but raw inside.? Lower the heat if they are burning before cooking through.
    • They become mushy when served immediately.? Let the cooked burgers rest for a couple of minutes to firm up.
    • The patties stick and break apart when flipping.? Use a non-stick pan or add a touch of oil to prevent sticking.

    Black Bean Burgers

    Black bean burgers are hearty, rustic patties made from mashed black beans, oats, and aromatic seasonings, cooked until golden and crispy on the outside. The mixture is shaped into thick patties and pan-fried to develop a smoky aroma and a satisfying texture that combines crunch with a tender interior. Perfect for a casual, flavorful meal that embraces imperfections and simple ingredients.
    Prep Time 20 minutes
    Cook Time 10 minutes
    Total Time 35 minutes
    Servings: 4
    Course: Main Course
    Cuisine: American
    Calories: 250

    Ingredients
      

    • 1 can black beans rinsed and drained
    • 1/2 small onion finely chopped
    • 2 cloves garlic minced
    • 1 teaspoon smoky paprika
    • 1/2 cup oats rolled or quick oats
    • 1 large egg lightly beaten
    • 1/2 teaspoon salt
    • 1/4 teaspoon pepper
    • 1/2 teaspoon cumin
    • 1-2 tablespoons oil for frying

    Equipment

    • Mixing bowl
    • Frying pan or skillet
    • Spatula
    • Measuring cups and spoons
    • Plate or tray

    Method
     

    1. Start by rinsing and draining a can of black beans, then mash them roughly in a mixing bowl, leaving some chunky bits for texture.
    2. Add finely chopped onion and minced garlic to the mashed beans, stirring to combine until fragrant and well mixed.
    3. Sprinkle in smoky paprika, salt, pepper, and cumin, mixing thoroughly to distribute the spices evenly across the bean mixture.
    4. Add the oats and lightly beaten egg to the bowl, then fold everything together until a sticky, cohesive mixture forms. If it feels too loose, sprinkle in a bit more oats.
    5. Divide the mixture into four equal portions, then shape each into a thick patty about 1.5 cm (half an inch) thick using your hands. Place the formed patties onto a tray or plate.
    6. Chill the shaped patties in the refrigerator for about 15 minutes to help them firm up and hold their shape during cooking.
    7. Heat a tablespoon of oil in a skillet over medium heat until shimmering and fragrant. Carefully place the patties into the hot pan without overcrowding.
    8. Cook the patties for about 4-5 minutes on each side, until they develop a deep golden color and a slight crisp on the edges. Listen for a gentle sizzle and watch for browning.
    9. Use a spatula to carefully flip the burgers, pressing slightly to ensure even contact with the pan. Cook until both sides are crispy and cooked through.
    10. Once cooked, transfer the burgers to a plate lined with paper towels to absorb any excess oil. Let them rest for a minute to firm up.
    11. Serve the black bean burgers hot, with your favorite buns, toppings, or sides. Enjoy their hearty texture and smoky flavor in each bite!
    These burgers come together fast and hit a satisfying, hearty note. They’re perfect for a quick weeknight dinner, especially when you want something filling but not heavy. Feel free to customize with your favorite toppings or a spicy aioli to make them your own.

  • Bat-Shaped Calzones: A Playful Twist on Pizza Night

    Bat-Shaped Calzones: A Playful Twist on Pizza Night

    I love turning a simple dinner into a bit of a show, and these bat-shaped calzones do just that. They’re a playful way to bring a little whimsy to the table, especially around spooky seasons or kids’ parties. Plus, making them feels like a tiny craft project—dough in hand, shapes taking form, expectations rising.

    Why I Keep Coming Back to This Recipe

    Making these calzones reminds me of childhood craft projects, messy but joyful. They’re a perfect way to break routine, especially when I want to surprise friends or family. The process is satisfying, and the result—fun shapes filled with comfort—never fails to bring a smile.

    Breaking Down the Ingredients

    • Pizza dough: Simple, forgiving base that’s chewy and crisp. Swap for a pre-made dough if short on time.
    • Mozzarella cheese: Oozy and melty, it’s the heart of the filling. Use a good-quality, fresh block for stretch.
    • Pepperoni or sausage: Adds a smoky, savory kick. Veggie options like mushrooms work well too.
    • Tomato sauce: Bright, tangy layer that keeps the filling moist. Consider a splash of hot sauce for heat.
    • Egg wash: Gives a shiny, golden crust. Mix with a pinch of salt for extra flavor.
    • Dough scraps: Used to cut out wings and ears, adding playful details to your calzones.

    Tools of the Trade for Bat-Shaped Calzones

    • Large mixing bowl: Mix and rest the dough comfortably.
    • Rolling pin: Roll the dough into thin, even circles.
    • Baking sheet lined with parchment: Bake without sticking and for easy cleanup.
    • Sharp knife or scissors: Cut out bat wings and ears.
    • Pastry brush: Apply a light egg wash for a shiny finish.

    Crafting the Perfect Bat-Shaped Calzones

    Step 1: Mix the dough ingredients in a large bowl until shaggy and sticky. Cover and let rest for 30 minutes.

    Step 2: Divide the dough into 4 equal parts. Roll each into a thin circle, about 15 cm (6 inches) across.

    Step 3: Place a generous spoonful of filling in the center of each circle. Fold in half and pinch edges to seal.

    Step 4: Cut out bat wings and ears from extra dough scraps. Attach to the calzones with a bit of water.

    Step 5: Bake at 220°C (430°F) on a parchment-lined baking sheet for 15-20 minutes, until golden and puffed.

    Step 6: Let cool for 5 minutes before serving to avoid burns and check for perfect crust.

    Key Tips to Nail Your Bat-Shaped Calzones

    • Dough should be soft but not sticky—adjust flour or water as needed.
    • Ensure filling isn’t too wet to prevent soggy crust.
    • Edges should be sealed well to prevent filling leaks during baking.
    • Watch for a golden-brown crust—don’t let them burn, but aim for crispiness.

    Common Mistakes and How to Fix Them

    • Dough sticking to your hands or surface.? Dough is too sticky → Dust with a little more flour and knead gently.
    • Filling oozing out during baking.? Filling leaks → Seal edges thoroughly with water and pinch tightly.
    • Underbaked, pale crust.? Crust too pale → Brush with beaten egg or milk before baking.
    • Over-torched, dark edges.? Burnt wings → Cover with foil mid-bake if edges brown too quickly.

    Bat-Shaped Calzones

    These playful bat-shaped calzones are made by folding and sealing pizza dough filled with cheesy, savory ingredients, then decorated with dough wings and ears. Baked until golden and puffed, they present a fun, whimsical look with a crispy exterior and gooey filling, perfect for spooky seasons or kids’ parties.
    Prep Time 45 minutes
    Cook Time 20 minutes
    Total Time 1 hour 5 minutes
    Servings: 4
    Course: Main Course
    Cuisine: American
    Calories: 420

    Ingredients
      

    • 2 ½ cups all-purpose flour for dough
    • 1 teaspoon instant yeast
    • 1 teaspoon salt
    • ¾ cup warm water about 110°F
    • 1 tablespoon olive oil
    • 1 cup mozzarella cheese shredded
    • ½ cup tomato sauce for filling
    • ½ cup pepperoni slices or cooked sausage
    • 1 egg egg beaten, for egg wash
    • additional dough scraps dough scraps for wings and ears

    Equipment

    • Large mixing bowl
    • Rolling pin
    • Baking sheet lined with parchment
    • Sharp knife or scissors
    • Pastry brush

    Method
     

    1. Combine the flour, yeast, and salt in a large bowl. Add warm water and olive oil, then stir until a shaggy dough forms. Knead the dough on a floured surface for about 5 minutes until smooth and elastic. Cover and let rest for 30 minutes to relax.
    2. Divide the rested dough into four equal portions and roll each into a thin, round circle about 15 cm (6 inches) across. Use a rolling pin for even thickness and a smooth surface.
    3. Place a generous spoonful of tomato sauce in the center of each dough circle. Top with shredded mozzarella and pepperoni slices, spreading evenly but leaving a small border around the edges.
    4. Fold each circle in half over the filling, then pinch the edges firmly together to seal completely, creating a half-moon shape. Gently press along the edges to ensure no filling escapes during baking.
    5. Use scissors or a sharp knife to cut small bat wings and ears from the extra dough scraps. Attach these decorative pieces to the calzones with a little water along the edges, pressing gently to secure.
    6. Preheat your oven to 220°C (430°F). Line a baking sheet with parchment paper. Arrange the assembled calzones on the sheet, spacing them slightly apart.
    7. Brush the tops and edges of the calzones with the beaten egg to give a shiny, golden finish. Place in the oven and bake for 15-20 minutes, until puffed and golden brown.
    8. Remove the calzones from the oven and let them cool for about 5 minutes. The crust should be crispy and golden, and the filling bubbly and melty inside.
    9. Serve the warm bat-shaped calzones with a smile, perfect for sharing and celebrating spooky or fun occasions.

    Notes

    Ensure the edges are well sealed to prevent filling leaks. Use dough scraps to create fun wings and ears for a playful presentation.
    These calzones are a riot to make and even more fun to eat. Their playful shape invites a little chaos in the kitchen and a lot of joy at the table. Feel free to experiment with fillings—spicy sausage, gooey cheese, or even a veggie medley—whatever makes you smile. Sometimes it’s the little quirks that turn a simple meal into a memorable moment.

  • Pumpkin Alfredo Pasta: A Cozy Fall Twist with a Silky, Savory Heart

    Pumpkin Alfredo Pasta: A Cozy Fall Twist with a Silky, Savory Heart

    Pumpkin Alfredo Pasta is a love letter to fall’s gentle, earthy flavors. I’ve always been drawn to the way roasted pumpkin transforms into a sweet, velvety sauce that feels like a warm blanket. When I want something cozy but with a little elegance, this dish hits just right. It’s simple, hearty, and a little unexpected—perfect for slow weekend dinners or a quick celebration of the season.

    Why I Keep Coming Back to This Pumpkin Alfredo

    Because it’s forgiving and transforms a simple fall ingredient into something decadent. It’s quick enough for a weeknight but special enough for guests. The aroma alone—sweet pumpkin, garlic, and toasted oil—fills the kitchen with a sense of home. Every spoonful reminds me that comfort food doesn’t have to be heavy; it can be elegant, warm, and deeply satisfying.

    Breakdown of Key Ingredients and Their Roles

    • Sugar pumpkin:: Sweet, earthy flesh that roasts into a silky sauce. Swap with butternut squash if needed.
    • Heavy cream:: Creates richness and smoothness. You can substitute with full-fat coconut milk for dairy-free.
    • Garlic:: Adds aromatic depth. Use more or less depending on your love for pungency.
    • Nutmeg:: A pinch brightens and balances the sweetness. Fresh grated is best.
    • Olive oil:: For roasting and sautéing, gives a fruity, smoky undertone.
    • Salt & pepper:: Essential for seasoning, bring out all the flavors.
    • Pasta (fettucine):: The canvas for your creamy, cozy sauce.

    Tools & Equipment for Pumpkin Alfredo

    • Baking sheet: Roast pumpkin halves evenly and develop caramelized edges.
    • Blender or immersion blender: Puree roasted pumpkin into a smooth, creamy sauce.
    • Large pot: Cook pasta to al dente.
    • Large skillet: Combine sauce and pasta, toss to coat.
    • Measuring cups and spoons: Accurately measure cream, oil, and seasonings.

    Step-by-Step to Silky Pumpkin Alfredo

    Step 1: Start by roasting a small sugar pumpkin—cut in half, scoop out seeds, and bake at 200°C (400°F) for about 40 minutes until tender and caramelized.

    Step 2: While pumpkin roasts, cook 400g of fettuccine in salted boiling water until al dente, about 10 minutes. Drain, saving some pasta water.

    Step 3: Make the pumpkin sauce: scoop out roasted pumpkin and blend with 1 cup of heavy cream, a pinch of nutmeg, and a splash of olive oil until smooth and velvety.

    Step 4: In a large pan, gently heat the pumpkin mixture over medium-low. Add drained pasta, toss to coat, and loosen with a bit of reserved pasta water if needed. Season with salt and pepper.

    Cooking Checkpoints & Tips for Success

    • Pumpkin should be easily pierced with a fork and caramelized on the edges.
    • Pasta water should be starchy; use it to help the sauce cling better.
    • The sauce should be silky, not runny or clumpy—adjust with more cream or pasta water.
    • Watch the garlic—overcooking turns it bitter, so add it late with the pumpkin to keep it sweet.

    Common Mistakes & How to Correct Them

    • Sauce is too thick and gloopy.? Use too much pumpkin—add more cream or pasta water to loosen the sauce.
    • Pumpkin is dry and stringy.? Overcooked pumpkin—check for softness after 30 minutes, not 40.
    • Garlic turns bitter and overpowering.? Add garlic at the right time—sauté briefly to keep it fragrant.
    • Sauce feels heavy and clumpy.? Don’t forget to save pasta water—use it to loosen and silkify the sauce.

    Pumpkin Alfredo Pasta

    Pumpkin Alfredo Pasta combines roasted, sweet pumpkin pureed into a velvety sauce with al dente fettuccine, creating a comforting yet elegant fall dish. The process involves roasting pumpkin, blending it into a creamy sauce, and tossing it with pasta for a smooth, rich final texture that’s both hearty and refined.
    Prep Time 15 minutes
    Cook Time 50 minutes
    Total Time 1 hour 5 minutes
    Servings: 4
    Course: Main Course
    Cuisine: American
    Calories: 520

    Ingredients
      

    • 1 small sugar pumpkin halved and seeded
    • 400 g fettuccine uncooked
    • 1 cup heavy cream
    • 2 cloves garlic minced
    • 1 pinch nutmeg fresh grated if possible
    • 2 tablespoons olive oil divided
    • to taste salt and pepper for seasoning

    Equipment

    • Baking sheet
    • Blender or immersion blender
    • Large pot
    • Large skillet
    • Measuring cups and spoons

    Method
     

    1. Preheat your oven to 200°C (400°F). Place the pumpkin halves cut side up on a baking sheet, drizzle with a tablespoon of olive oil, and roast for about 40 minutes until the flesh is tender and caramelized around the edges. The pumpkin should be soft enough to pierce easily with a fork.
    2. While the pumpkin roasts, bring a large pot of salted water to a boil and cook the fettuccine until al dente, about 10 minutes. Drain, reserving a cup of pasta water for adjusting the sauce later.
    3. Once the pumpkin is roasted and cool enough to handle, scoop out the flesh and transfer it to a blender or use an immersion blender. Add the heavy cream, a pinch of nutmeg, and a tablespoon of olive oil, then blend until smooth and velvety. Taste and adjust seasoning with salt and pepper.
    4. In a large skillet, heat a teaspoon of olive oil over medium-low heat. Add the minced garlic and sauté until fragrant, about 30 seconds, being careful not to burn it—this keeps the garlic sweet and aromatic.
    5. Pour the pumpkin sauce into the skillet with garlic, stirring gently. Warm the sauce over medium-low, allowing the flavors to meld and the mixture to heat through, about 2 minutes. It should become silky and fragrant.
    6. Add the drained pasta to the skillet with the pumpkin sauce. Toss gently to coat each strand evenly, adding a splash of reserved pasta water if needed to loosen the sauce and achieve a creamy, clingy consistency. Season with salt and pepper to taste.
    7. Serve the Pumpkin Alfredo Pasta hot, garnished with a light sprinkle of freshly grated nutmeg or herbs if desired. The sauce should be smooth, coating the pasta generously, with a comforting aroma of roasted pumpkin and garlic.

    Notes

    For a dairy-free version, substitute heavy cream with full-fat coconut milk. To enhance flavor, sprinkle with grated Parmesan or fresh herbs before serving.
    This dish is a warm hug in a bowl, perfect for chilly nights or when you want to bring a bit of nostalgia into mealtime. The roasted pumpkin adds a gentle sweetness that balances the richness of the cream, creating a comforting yet sophisticated flavor. Feel free to swap in sage or a drizzle of browned butter for extra depth. Enjoy making this your own—it’s all about cozy, imperfect joy.

  • Spooky Shepherd’s Pie: A Gothic Twist on Comfort Food

    Spooky Shepherd’s Pie: A Gothic Twist on Comfort Food

    Shepherd’s pie is a classic comfort dish, but I like to think of this version as a little more shadowy and mysterious. The smoky meat and velvety mash turn familiar into something a little darker, a little more intriguing. It’s the kind of meal that feels like a secret, perfect for nights when you want to keep things cozy but with a twist.

    Why I Keep Returning to This Dish

    It’s a true test of comfort and creativity. The smoky, savory layers make every bite feel like an adventure. Plus, it’s endlessly adaptable—perfect for cozy nights or eerie dinner parties. No matter how often I make it, it still feels like a little secret I’m eager to share.

    Spooky Ingredient Secrets

    • Potatoes: Creamy mash base, use starchy potatoes like Russets for fluffiness.
    • Ground meat: Beef or lamb, browned until crispy for texture and flavor.
    • Vegetables: Peas and carrots add sweetness and color, fresh or frozen.
    • Seasonings: Worcestershire, garlic, salt, and pepper deepen the flavor.
    • Butter & milk: Make mash rich and smooth, essential for that velvety top.
    • Red wine or balsamic: Adds a smoky, slightly tangy note to the filling.
    • Cheddar or optional toppings: For a cheesy, crispy crust—skip if you want pure darkness.

    Tools of the Spooky Trade

    • Large pot: Boil potatoes until tender.
    • Skillet or frying pan: Brown the meat and sauté vegetables.
    • Masher or fork: Mash the potatoes smoothly.
    • Baking dish: Bake the assembled shepherd’s pie.
    • Oven: Finish the dish with a crispy top.

    Guide to Crafting the Perfect Spooky Shepherd’s Pie

    Step 1: Preheat your oven to 200°C (390°F).

    Step 2: Peel and chop about 4 large potatoes for the mash. Boil in salted water until tender, about 15 minutes.

    Step 3: While potatoes cook, sauté 1 pound ground beef or lamb in a pan over medium heat until browned and crispy around the edges, about 8 minutes.

    Step 4: Add chopped onions, garlic, and a splash of red wine or balsamic vinegar to the meat. Cook until fragrant, about 3 minutes.

    Step 5: Stir in peas, carrots, and a dash of Worcestershire sauce. Let simmer for 5 minutes.

    Step 6: Drain potatoes, mash with butter, a splash of milk, and a pinch of salt until creamy and slightly fluffy.

    Step 7: Spread the meat mixture in a baking dish, then top with the mashed potatoes.

    Step 8: Bake uncovered for 20 minutes, until the top is golden and slightly crispy.

    Creepily Carefully Checked: Shepherd’s Pie Tips

    • Meat should be browned and slightly crispy, not grey or soggy.
    • Potatoes need to be fully tender before mashing, so don’t rush the boiling.
    • The top should turn a deep golden brown, not burnt or pale.
    • The filling should bubble around the edges when it’s ready for the oven.

    Ghostly Glitches and How to Vanish Them

    • Meat turns out too greasy.? If the meat is soggy, increase the heat and cook until crispy.
    • Filling is too runny.? Drain excess liquid from the filling before baking.
    • Potato mash is too sticky.? If the mash is gluey, add a bit more milk or butter.
    • Top isn’t golden enough.? Broil the top for an extra crispy finish.

    Spooky Shepherd’s Pie

    This dark twist on the classic shepherd’s pie features smoky, savory meat layered beneath a velvety mashed potato topping. The dish boasts a rich, crispy top with bubbling, flavorful filling, creating a comforting yet mysterious presentation perfect for cozy or eerie gatherings.
    Prep Time 20 minutes
    Cook Time 40 minutes
    Total Time 1 hour
    Servings: 4
    Course: Main Course
    Cuisine: Comfort
    Calories: 520

    Ingredients
      

    • 4 large potatoes Russet potatoes recommended for fluffiness
    • 1 pound ground beef or lamb choose your preferred meat
    • 1 cup peas fresh or frozen
    • 2 carrots carrots diced
    • 1 small onion chopped
    • 2 cloves garlic minced
    • 1/4 cup red wine or balsamic vinegar adds smoky depth
    • 2 tablespoons butter for mash
    • 1/4 cup milk for mash
    • Worcestershire sauce Worcestershire to deepen flavor
    • shredded cheddar cheese Cheddar (optional) for topping

    Equipment

    • Large pot
    • Skillet or frying pan
    • Masher or fork
    • Baking dish
    • Oven

    Method
     

    1. Peel and chop the potatoes into even chunks, then place them in a large pot filled with salted water. Bring to a boil and cook until tender, about 15 minutes, until they easily mash when pierced.
    2. While the potatoes cook, heat a skillet over medium heat. Add the ground meat and cook, breaking it apart with a spoon, until browned and crispy around the edges, about 8 minutes. Drain excess fat if necessary.
    3. Add chopped onions, minced garlic, and a splash of red wine or balsamic vinegar to the meat. Sauté until the onions are translucent and fragrant, about 3 minutes, and the mixture begins to bubble slightly.
    4. Stir in diced carrots, peas, and a dash of Worcestershire sauce. Let everything simmer together for about 5 minutes, until the vegetables are tender and the filling is flavorful.
    5. Drain the cooked potatoes and return them to the hot pot. Add butter, milk, and a pinch of salt. Mash everything together until smooth, fluffy, and velvety—be sure to get rid of any lumps.
    6. Preheat your oven to 200°C (390°F). Spread the meat and vegetable filling evenly in a baking dish.
    7. Top the filling with the mashed potatoes, spreading them out smoothly with a spatula to create an even layer. For an extra touch of darkness, sprinkle shredded cheddar cheese on top if desired.
    8. Bake uncovered for 20 minutes, until the top is golden brown and slightly crispy around the edges, and the filling is bubbling around the sides.
    9. For an extra crispy top, broil the dish for 2-3 minutes until deep golden and crispy—watch carefully to prevent burning.
    10. Remove from the oven and let rest for a few minutes. Serve hot, with the dark, smoky flavors and crispy top inviting everyone to dig in.

    Notes

    For a richer flavor, use a splash of red wine in the filling. Feel free to add a dash of smoked paprika for extra smoky depth. Keep an eye on the oven so the top turns a deep golden brown without burning.
    This dish feels like a warm blanket with a mysterious edge. The smoky beef, sweet peas, and fluffy mash come together in a way that’s both familiar and a little daring. It’s perfect for a cozy night when you want something hearty but with a hint of intrigue. Feel free to add a splash of hot sauce or a sprinkle of sharp cheddar—make it your own spooky masterpiece.

  • Creepy Stuffed Shells: A Spooky Twist on Comfort Food

    Creepy Stuffed Shells: A Spooky Twist on Comfort Food

    Creepy stuffed shells tap into that thrill of the unexpected in comfort food. It’s a bit rebellious, a little spooky, but mostly just deeply satisfying. The idea of stuffing pasta with a rich, cheesy filling feels like a playful nod to Halloween or even a midnight snack. It’s the kind of dish that invites a bit of chaos at the dinner table, in the best way.

    Why I keep coming back to this creepy favorite

    It’s the perfect blend of chaos and comfort. The messier, the better—because it means more cheese and sauce everywhere. Plus, it’s forgiving, so you can tweak fillings and toppings to your mood. Every time I make it, I remember those childhood nights when dinner was a little spooky, a little fun, and totally satisfying.

    Breaking down the creepy ingredients

    • Pasta shells: Large, sturdy shells that cradle the cheesy filling, with a chewy bite.
    • Ricotta cheese: Creamy and mild, it’s the backbone of the stuffing, bringing richness.
    • Mozzarella: Oozes out in strings, adding gooey texture and stretch.
    • Fresh spinach: Adds a pop of green, vibrant flavor, and a touch of bitterness.
    • Marinara sauce: Bright, tangy, and slightly sweet, it keeps everything moist and flavorful.
    • Nutmeg: A pinch adds warmth and depth to the cheese mixture.
    • Extra cheese for topping: Creates that irresistible crispy, cheesy crust.

    Tools of the spooky trade

    • Large pot: Boiling pasta shells to the perfect bite.
    • Mixing bowl: Combining cheeses, spinach, and seasonings.
    • Spoon or piping bag: Stuffing the shells neatly.
    • Baking dish: Holding the shells and sauce during baking.
    • Oven: Transforming raw ingredients into gooey, golden perfection.

    Step-by-step guide to crafting creepy stuffed shells

    Step 1: Preheat your oven to 180°C (350°F).

    Step 2: Cook the pasta shells in boiling salted water for 8 minutes, until just al dente.

    Step 3: Drain and set aside to cool slightly.

    Step 4: Prepare the filling by mixing ricotta, shredded mozzarella, chopped spinach, and a pinch of nutmeg.

    Step 5: Stuff each shell generously with the cheese mixture, pressing lightly to seal.

    Step 6: Arrange the stuffed shells in a baking dish, sauce them with marinara, and sprinkle extra cheese on top.

    Step 7: Bake uncovered for 25-30 minutes until bubbly and golden around the edges.

    Step 8: Let rest for 5 minutes before serving for the best gooey, cheesy experience.

    Cooking checkpoints for perfect creepy shells

    • Shells should be just firm enough to hold without cracking.
    • The filling needs to be well mixed and moist but not runny.
    • Cheese on top should be melted and slightly browned for that crispy edge.
    • The sauce should bubble around the edges, indicating it’s hot and ready.
    • Rest time helps the cheese set, making each bite less messy.

    Common missteps and how to fix them

    • Shells cracking during boiling.? Use tongs to prevent shells from tearing.
    • Filling spilling out during stuffing.? Add a splash of water if filling is too thick.
    • Cheese topping not crisping up.? Broil for 2 minutes if cheese isn’t browning.
    • Burnt cheese or sauce drying out.? Cover with foil if edges over-brown.

    Creepy Stuffed Shells

    Creepy stuffed shells are a playful, spooky twist on classic comfort food, featuring large pasta shells filled with a rich cheese and spinach mixture. Baked until bubbly and golden, the dish boasts a gooey, cheesy texture with a hint of green from fresh spinach. The final appearance is a bubbling, crispy-topped casserole perfect for Halloween or a fun dinner night.
    Prep Time 15 minutes
    Cook Time 30 minutes
    Total Time 45 minutes
    Servings: 4
    Course: Main Course
    Cuisine: American
    Calories: 450

    Ingredients
      

    • 12 large pasta shells sturdy shells for stuffing
    • 1 cup ricotta cheese rich and creamy filling base
    • 1 cup mozzarella cheese shredded, for gooeyness and topping
    • 1/2 cup fresh spinach chopped finely
    • 2 cups marinara sauce bright and tangy
    • 1/4 teaspoon nutmeg adds warmth and depth
    • 1 cup extra shredded cheese for topping, crispy crust

    Equipment

    • Large pot
    • Mixing bowl
    • Spoon or piping bag
    • Baking dish

    Method
     

    1. Preheat your oven to 180°C (350°F) to get it ready for baking the shells.
    2. Bring a large pot of salted water to a boil and cook the pasta shells for about 8 minutes until just al dente. They should be tender but still hold their shape.
    3. Drain the shells carefully and set them aside to cool slightly so you can handle them without burning your fingers.
    4. In a mixing bowl, combine ricotta, shredded mozzarella, chopped spinach, and a pinch of nutmeg. Mix until well blended and the spinach is evenly distributed.
    5. Use a spoon or piping bag to stuff each shell generously with the cheese mixture, pressing lightly to seal the filling inside.
    6. Spread a thin layer of marinara sauce in the bottom of a baking dish, then arrange the stuffed shells on top. Cover with remaining marinara and sprinkle extra shredded cheese evenly over the shells.
    7. Bake uncovered in the preheated oven for 25 to 30 minutes, until the sauce is bubbling and the cheese on top is melted and golden brown.
    8. Remove from oven and let rest for 5 minutes to allow the cheese to set, making it easier to serve and preventing messy bites.
    9. Serve hot, with some extra sauce if desired, and enjoy the gooey, cheesy, spooky goodness!
    This dish feels like a daring throwback with a twist, perfect for a cozy night or a spooky gathering. The gooey cheese, combined with the tender pasta and vibrant filling, makes every bite a little celebration of comfort and chaos. Feel free to add your own dark twists—maybe a splash of smoky paprika or a dash of hot sauce—just to keep things interesting. Enjoy making it your own, and don’t rush; sometimes, the messier, the better.

  • Black Pasta with Squid Ink: A Deep Dive into the Ocean’s Shadow

    Black Pasta with Squid Ink: A Deep Dive into the Ocean’s Shadow

    Black pasta with squid ink is a dish that feels like a secret shared with the ocean. It’s a rare find in regular grocery aisles, but the effort to make it at home is worth every minute. The ink adds a smoky, slightly bitter depth that’s both dramatic and comforting.

    Why this dish keeps pulling me back.

    Every time I make it, I’m reminded of seaside markets and the thrill of catching something rare. The ink’s smoky punch awakens my senses, and the simple act of tossing pasta into that dark sauce feels like a small rebellion. It’s a dish that feels both luxurious and comforting, perfect for when I need a little oceanic escape.

    Breaking down the key ingredients.

    • Black pasta (or regular pasta + squid ink): Gives the dish its signature look and a slight chew, the ink deepens the flavor.
    • Squid ink: Adds a smoky, briny flavor that’s intensely oceanic, like a walk along the coast at dawn.
    • Garlic: Fills the kitchen with a warm, pungent aroma; essential for depth.
    • White wine: Brightens the ink’s richness and balances the smoky notes.
    • Olive oil: The base of the sauce, glossy and fragrant—think green, grassy, with a hint of fruit.
    • Pasta water: Starchy and salty, it helps loosen the sauce and cling to the noodles.

    Tools of the trade for a perfect squid ink pasta.

    • Large pot: Boil pasta evenly and efficiently.
    • Wide skillet or frying pan: Create a deep, even space for ink sauce and pasta.
    • Ladle or small cup: Measure and reserve pasta cooking water.
    • Wooden spoon or spatula: Gently stir and combine ingredients without breaking the pasta.

    The process of transforming simple pasta into an oceanic canvas.

    Step 1: Bring a large pot of water to a rolling boil, add a generous pinch of salt, and cook the black pasta until just al dente, about 9-11 minutes.

    Step 2: While pasta cooks, heat a wide skillet over medium heat, add olive oil, and sauté finely chopped garlic until fragrant, about 30 seconds.

    Step 3: Add squid ink and a splash of white wine to the skillet; stir gently to combine and let it simmer for 2 minutes, releasing a smoky, briny aroma.

    Step 4: Drain the pasta, reserving a cup of the cooking water, and toss it into the ink sauce. Cook together for 1 minute to meld flavors.

    Cooking checkpoints and tips for perfect black pasta.

    • Pasta should be just shy of fully cooked when added to the sauce; it will finish cooking in the pan.
    • The ink sauce should be velvety, not gloopy or watery; adjust with reserved pasta water.
    • Smell for a smoky, slightly briny aroma—if it’s faint, increase the heat slightly and stir longer.
    • The pasta color will deepen as it absorbs the ink; avoid overcooking to keep the texture tender, not mushy.

    Common mistakes and how to fix them.

    • Overcooked pasta turns mushy, losing bite.? UNDERRIPENED PASTA? Cook a minute longer, taste a strand—should be tender but firm.
    • Gritty or clumpy ink.? INK SAUCE CLUMPY? Stir constantly on low heat, add a splash of warm water to loosen.
    • Too much alcohol or too high heat.? SPLASH OF WINE BURNS OFF? Reduce heat and add a splash of broth or water.
    • Sauce is too thick or gloopy.? SAUCY? Add reserved pasta water a tablespoon at a time until velvety.

    Black Pasta with Squid Ink

    Black pasta with squid ink is a striking dish where al dente pasta is tossed in a velvety, smoky ink sauce infused with garlic, white wine, and olive oil. The intense black color and briny flavor create a dramatic visual and oceanic taste experience, finished with a glossy, tender texture that feels both luxurious and comforting.
    Prep Time 10 minutes
    Cook Time 20 minutes
    Total Time 30 minutes
    Servings: 4
    Course: Main Course
    Cuisine: Seafood
    Calories: 420

    Ingredients
      

    • 400 grams black pasta or regular pasta with squid ink preferably fresh or high-quality dried
    • 2 cloves garlic finely chopped
    • 60 ml white wine preferably dry
    • 3 tablespoons olive oil extra virgin recommended
    • 1 cup pasta water reserved from cooking pasta

    Equipment

    • Large pot
    • Wide skillet or frying pan
    • Ladle or small cup
    • Wooden spoon or spatula

    Method
     

    1. Bring a large pot of salted water to a rolling boil and add the black pasta. Cook until just al dente, about 9-11 minutes, until it has a slight bite and a deep, glossy black color.
    2. While the pasta cooks, heat olive oil in a wide skillet over medium heat. Add finely chopped garlic and sauté for about 30 seconds, until fragrant and slightly golden, filling the kitchen with a warm aroma.
    3. Add squid ink and a splash of white wine to the skillet. Stir gently to combine, then let it simmer for about 2 minutes, watching the sauce turn velvety with an intense smoky, briny aroma filling the air.
    4. Drain the pasta, reserving about a cup of the starchy cooking water. Add the drained pasta directly into the ink sauce in the skillet and toss gently to coat, allowing the color to deepen and flavors to meld, about 1 minute.
    5. If the sauce feels too thick or gloopy, add a little of the reserved pasta water, one tablespoon at a time, stirring constantly until it becomes silky and coats the pasta evenly.
    6. Once coated and heated through, taste the pasta and adjust seasoning if needed. The sauce should be velvety, with a smoky oceanic flavor and glossy appearance, ready to serve immediately.

    Notes

    Ensure not to overcook the pasta to maintain a tender yet firm bite. Stir the sauce gently to prevent clumping and to keep the color deep and uniform. Use good quality squid ink for the best flavor and color intensity.
    This dish isn’t just about the striking black color or the umami punch. It’s about embracing the sea’s complexity in every bite, a reminder of how ingredients can tell stories. Feel free to adjust the ink or add a squeeze of lemon for brightness. It’s a dish that invites personal tweaks—play with heat, acidity, or seafood accents. Enjoy making it your own, a small ode to the mysterious depths.

  • Eyeball Meatballs: A Surprising Take on a Classic

    Eyeball Meatballs: A Surprising Take on a Classic

    Eyeball meatballs might sound bizarre, but they’re a fun, visually striking way to elevate your usual meatball game. I stumbled upon the idea after a late-night kitchen experiment, and the result was shockingly delicious. The crispy exterior and tender interior make them a perfect snack or party appetizer, especially if you’re into playful, unexpected bites. Plus, they give you a reason to get a little creative with presentation.

    Why I keep coming back to eyeball meatballs

    They’re unexpectedly fun, surprising guests and making me smile every time. I love how playful they look and taste, blending comfort with a wild visual. Plus, they’re versatile—serve with spicy sauce or a simple gremolata. This dish keeps me experimenting, laughing, and craving that crispy, savory bite.

    Breaking down the ingredients for eyeball meatballs

    • Ground beef or pork: Main binder, juicy and rich. Swap with turkey for leaner options.
    • Eggs: Bind everything together, keeps the shape firm. No substitution needed.
    • Breadcrumbs: Adds texture and helps bind. Use panko for extra crunch.
    • Garlic and herbs: Flavor punch—think parsley or basil. Adjust to your taste buds.
    • Olive oil or neutral oil: For frying, ensures a crispy exterior with a hot shimmer.
    • A pinch of salt and pepper: Basic seasoning to enhance all flavors.
    • A tiny splash of soy sauce or Worcestershire: Adds umami depth, just a dash to keep it balanced.

    Tools of the trade for eyeball meatballs

    • Mixing bowl: Combine all ingredients evenly without overworking the mixture.
    • Skillet or frying pan: Cook the meatballs evenly with enough space to turn them comfortably.
    • Slotted spoon: Remove meatballs from hot oil without splashing.
    • Meat thermometer: Ensure meatballs reach a safe internal temperature.
    • Paper towels: Drain excess oil and keep the meatballs crispy.

    Step-by-step: Crafting eyeball meatballs from scratch

    Step 1: Gather your ingredients and equipment before starting. This keeps you moving smoothly and avoids last-minute scrambles.

    Step 2: Mix the eyeball meat mixture gently, just enough to combine. Over-mixing can lead to dense meatballs.

    Step 3: Shape the mixture into uniform balls, about the size of a golf ball. This helps them cook evenly.

    Step 4: Heat oil in a skillet over medium-high heat, about 180°C (350°F). When the oil shimmers, you’re ready to fry.

    Step 5: Fry the meatballs in batches, turning occasionally, until they are golden brown and firm, about 8-10 minutes.

    Step 6: Remove the meatballs and drain on paper towels. Rest for 5 minutes before serving to lock in juices.

    Cooking checkpoints and tips for perfect eyeball meatballs

    • Ensure oil is hot enough before frying — a splash of water should sizzle immediately.
    • Watch for a golden-brown color on the meatballs; don’t rush the frying process.
    • Gently shake the pan to prevent sticking and uneven browning.
    • Use a meat thermometer to check for an internal temperature of 70°C (160°F).
    • Rest the meatballs briefly before serving to avoid them falling apart.

    Common pitfalls and how to fix them

    • Over-mixing the meat mixture.? Use a gentle hand when mixing to prevent dense meatballs.
    • Dropping cold meatballs into oil.? Allow oil to heat fully before adding meatballs.
    • Crowding the pan.? Cook in batches for even browning.
    • Guessing when meatballs are cooked.? Use a thermometer to check doneness.

    Eyeball Meatballs

    Eyeball meatballs are playful, visually striking bites made from seasoned ground meat, shaped into small balls with a unique ‘eyeball’ appearance. Crispy on the outside and tender inside, they are fried until golden and served as a fun snack or party appetizer, perfect for surprising guests. The dish combines rich flavors with a playful presentation, encouraging creativity in serving options.
    Prep Time 15 minutes
    Cook Time 10 minutes
    Total Time 25 minutes
    Servings: 4
    Course: Main Course
    Cuisine: American
    Calories: 250

    Ingredients
      

    • 1 lb ground beef or pork or turkey for leaner option
    • 1 large egg to bind the mixture
    • 1/2 cup breadcrumbs panko for extra crunch
    • 2 cloves garlic minced
    • 2 tablespoons chopped fresh herbs parsley or basil
    • 2 tablespoons olive oil for frying
    • to taste salt and pepper seasoning
    • 1 teaspoon soy sauce or Worcestershire splash adds umami depth

    Equipment

    • Mixing bowl
    • Skillet or frying pan
    • Slotted spoon
    • Meat thermometer
    • Paper towels

    Method
     

    1. Gather all your ingredients and equipment so everything is within reach for a smooth cooking process.
    2. In a large mixing bowl, gently combine the ground meat, egg, breadcrumbs, minced garlic, chopped herbs, soy sauce, and a pinch of salt and pepper. Mix just until everything is evenly incorporated, being careful not to overwork the meat for tender results.
    3. Shape the mixture into small, uniform balls about the size of a golf ball, pressing gently to ensure they hold together well. This shape helps them cook evenly and creates a perfect ‘eyeball’ look.
    4. Heat the olive oil in a skillet over medium-high heat until shimmering and hot, about 180°C (350°F). You should see a gentle shimmer and hear a faint sizzle when the oil is ready.
    5. Carefully place the shaped meatballs into the hot oil, giving them space to cook without crowding the pan. Fry in batches if necessary to prevent overcrowding.
    6. Fry the meatballs, turning occasionally with a slotted spoon, until they are golden brown and crispy on all sides—about 8 to 10 minutes. You’ll hear a consistent sizzling and see a beautiful golden hue develop.
    7. Once cooked, transfer the meatballs to a plate lined with paper towels to drain excess oil. Let them rest for about 5 minutes to lock in juices and make them easier to handle.
    8. Set the meatballs on a serving platter and prepare to surprise your guests with their fun, eyeball-like appearance. Serve with your favorite dipping sauce or garnishes for extra flair.
    These eyeball meatballs are a quirky twist on a familiar dish, perfect for when you want to surprise and delight. They come out crispy on the outside, juicy inside, with an unexpected visual punch. Feel free to tweak the seasoning or sauce — this dish invites your personal touch. Enjoy that mix of nostalgia and novelty, knowing you made something memorable from scratch.