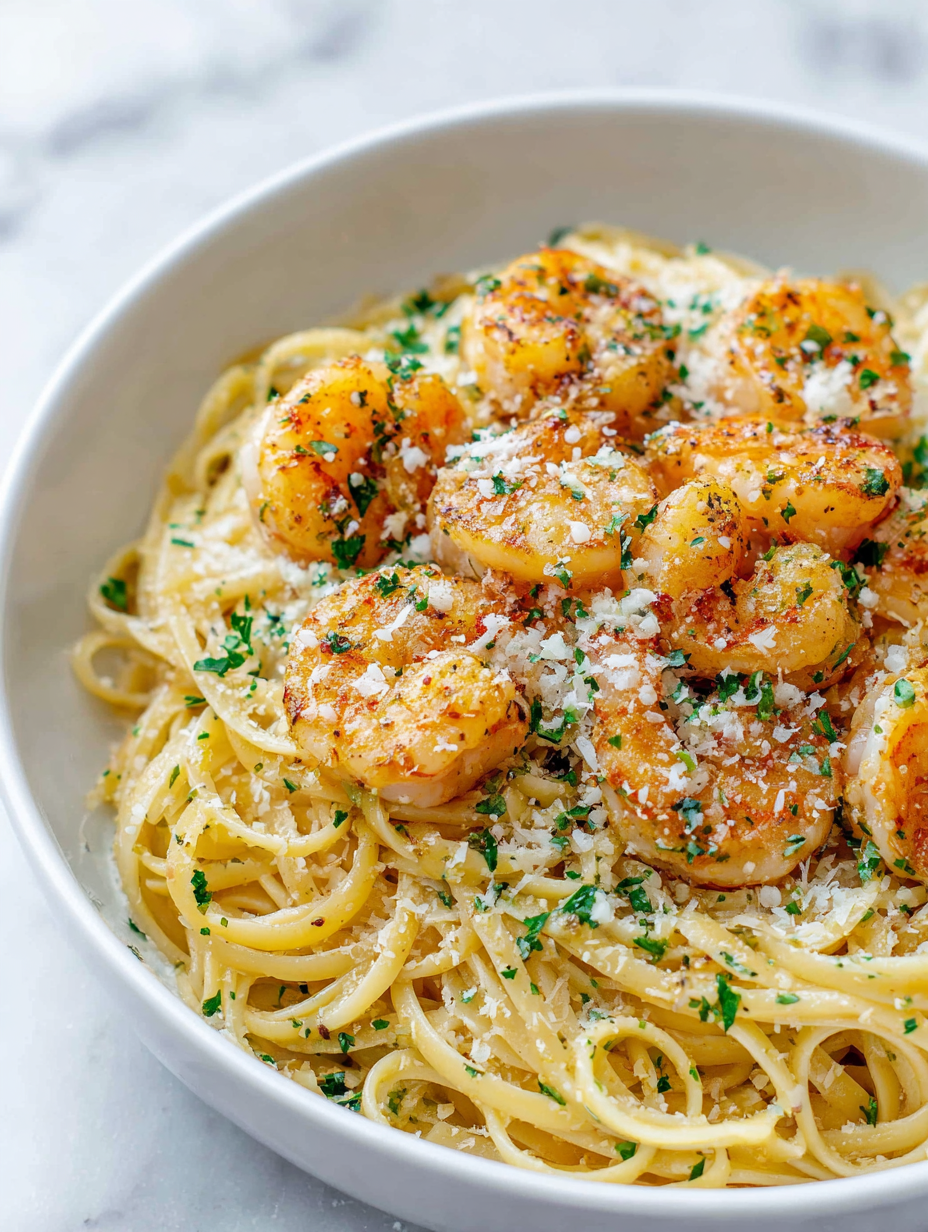
Category: Main Course

  • Monster Meatloaf: A Hearty Twist on a Classic

    Monster Meatloaf: A Hearty Twist on a Classic

    Once in a while, I crave a meatloaf that’s more beast than beauty—something with heft, lots of texture, and a bit of chaos in every slice. This isn’t your tidy, perfect loaf. It’s rugged, hearty, and a little wild, just like the monster it’s named after.
    The secret is in the rough edges and the chunky bits—each bite gives you a bit of crispy, caramelized goodness mixed with tender beef. It’s the kind of dish that feels like a warm, chaotic hug, perfect for a family dinner or an unexpected gathering.

    Why I keep coming back to this monster loaf

    It’s a messy, unapologetic comfort—no two slices are the same, and that’s the charm. The crispy edges and juicy center remind me of family dinners, chaos and all. It’s forgiving enough to tweak, hearty enough to satisfy, and imperfect enough to keep me experimenting.

    What’s in this beast—an ingredient breakdown

    • Ground beef: I like 80/20 for juiciness, but lean works too—just add a splash of broth.: Juicy, rich, with a satisfying chew, it’s the core of this monster.
    • Breadcrumbs: Use panko for crunch, or crushed crackers for extra flavor—soak briefly if dry.: Hold everything together, add texture, and soak up the juices.
    • Onions: Sauté until golden and sweet—adds depth and sweetness.: The aroma of caramelized onions is an instant mood enhancer.
    • Garlic: Minced fresh garlic boosts flavor—don’t skip it.: Sharp, fragrant, and essential.
    • Worcestershire sauce: Adds umami punch and a touch of smoky tang.: A little goes a long way—don’t overdo it.
    • Egg: Binds everything—use a large egg for stability.: Creamy, binding, and a little rich.
    • Tomato glaze: Ketchup mixed with hot sauce and vinegar—brush during baking.: Sweet, spicy, with a tangy finish—glossy and tempting.

    Tools of the beast: What you’ll need

    • Large mixing bowl: To combine all the ingredients with room to spare.
    • Baking sheet with parchment: To hold the loaf while it bakes and catch drips.
    • Skillet: For making the glaze and caramelizing the top.
    • Meat thermometer: To check doneness without guessing.
    • Basting brush: For applying the glaze evenly.

    Step-by-step: Crafting your monstrous meatloaf

    Step 1: Preheat your oven to 180°C (350°F).

    Step 2: Gather a large mixing bowl, a baking sheet, and a skillet.

    Step 3: In the bowl, combine ground beef, chopped onions, garlic, breadcrumbs, an egg, and some Worcestershire sauce.

    Step 4: Mix everything until just combined; don’t overwork the meat.

    Step 5: Shape the mixture into a large, uneven loaf—think rugged, not perfect.

    Step 6: Place on a baking sheet lined with parchment paper.

    Step 7: Bake for about 1 hour, until the top is crusty and dark golden.

    Step 8: While it bakes, prepare a simple tomato glaze: ketchup, a dash of hot sauce, and a splash of vinegar.

    Step 9: Brush the glaze over the loaf during the last 15 minutes of baking.

    Step 10: Remove from oven and let rest for 10 minutes before slicing.

    Step 11: Serve with mashed potatoes or roasted veg, and enjoy the messy, delicious heart of it.

    Cooking checkpoints for that perfect monster loaf

    • Look for a deep, golden crust that crackles when you tap it.
    • Use a meat thermometer—aim for 71°C (160°F) in the center.
    • The loaf should be firm but still juicy, not dry or crumbly.
    • Smell for that rich, roasted beef aroma—if it’s burnt, cover loosely with foil and lower the heat.

    Monster mistakes and how to tame them

    • Overworking the meat mixture, resulting in a tough loaf.? If the loaf is too dense, don’t overmix the meat—lighten the mixture with a gentle fold.
    • Burning the edges before the inside cooks.? If the crust is too burnt, cover loosely with foil and lower the oven temp slightly.
    • Dry, crumbly texture.? If it’s not juicy, add a splash of beef broth or tomato juice into the mixture.
    • Slippery, uneven glaze.? If the glaze slides off, wait until the loaf is slightly cooled before brushing again.

    Monster Meatloaf

    This hearty, rustic meatloaf is crafted with chunky ground beef, sautéed onions, and a tangy tomato glaze. It bakes into a rugged, crispy-edged loaf with a juicy, tender center, offering a chaotic but comforting dish perfect for family dinners or gatherings. Its imperfect shape and caramelized crust give it a wild, inviting appearance and texture.
    Prep Time 20 minutes
    Cook Time 1 hour
    Total Time 1 hour 20 minutes
    Servings: 6
    Course: Main Course
    Cuisine: American
    Calories: 520

    Ingredients
      

    • 1 lb ground beef (80/20 or lean) Juicy, rich, with a satisfying chew
    • 1/2 cup panko breadcrumbs For crunch and moisture absorption
    • 1 large onion Sautéed until golden and sweet
    • 2 cloves garlic Minced fresh garlic
    • 1 tbsp Worcestershire sauce Adds umami punch and smoky tang
    • 1 large egg Binds everything together
    • 1/4 cup ketchup Part of the glaze
    • 1 tsp hot sauce Adds spicy kick to glaze
    • 1 tbsp vinegar For tang in the glaze

    Equipment

    • Large mixing bowl
    • Baking sheet with parchment paper
    • Skillet
    • Meat thermometer
    • Basting brush

    Method
     

    1. Preheat your oven to 180°C (350°F). Gather your large mixing bowl, baking sheet with parchment, skillet, meat thermometer, and basting brush.
    2. Peel and finely chop the onion. Sauté it in the skillet over medium heat until golden and caramelized, filling your kitchen with a sweet, roasted aroma. Let it cool slightly.
    3. In the large mixing bowl, combine the ground beef, soaked panko breadcrumbs, sautéed onions, minced garlic, Worcestershire sauce, and the large egg. Mix gently until just combined—don’t overmix, to keep it tender and avoid toughness.
    4. Shape the mixture into a large, rugged, uneven loaf on the parchment-lined baking sheet. Feel free to make it chunky and imperfect—this adds to its wild charm.
    5. Bake the loaf in the preheated oven for about 50-60 minutes, until the crust is deep golden and crispy. The loaf should be firm but still juicy inside.
    6. While it bakes, prepare the glaze: mix ketchup, hot sauce, and vinegar in a small bowl. This spicy-sweet glaze will add a glossy finish and extra flavor.
    7. About 15 minutes before the loaf is done, brush the glaze generously over the top with a basting brush. Continue baking until the glaze is bubbling and slightly caramelized.
    8. Remove the meatloaf from the oven and let it rest for about 10 minutes. Use a meat thermometer to check that the center reaches 71°C (160°F) for perfect doneness.
    9. Slice into thick, uneven pieces to showcase its rustic, chaotic texture. The crust should crackle slightly when you cut into it.
    10. Serve your monster meatloaf with mashed potatoes or roasted vegetables. Enjoy the crispy edges, juicy interior, and wild, comforting heart of this dish!
    This monster meatloaf is a celebration of comfort food with a twist—think chunky, crispy edges and a juicy center. It’s perfect for feeding a crowd or just giving yourself a break from the usual. Play around with the spice mix or add a smoky chipotle kick if you’re feeling bold. No matter what, just dig in with a spoonful of gravy and a good laugh.

  • Pumpkin Mac and Cheese: A Cozy Fall Twist with a Chunky, Roasty Heart

    Pumpkin Mac and Cheese: A Cozy Fall Twist with a Chunky, Roasty Heart

    I started adding pumpkin to mac and cheese one chilly October, craving that roasted sweetness against the gooey cheese. It’s a way to bring a little fall into your bowl, even if it’s not quite pumpkin season. The process is simple but transforms a familiar comfort into something special, with a smoky depth that’s hard to beat.

    Why I Keep Coming Back to This Recipe

    It reminds me of fall family dinners, the smell of roasting pumpkin filling the house. It’s forgiving, customizable, and makes me feel grounded—an easy way to bring warmth and a bit of chaos to the table. Every spoonful is a tiny celebration of seasonal abundance.

    Breaking Down the Pumpkin Mac and Cheese

    • Pumpkin: Roasted pumpkin adds a sweet, smoky flavor and creamy texture.
    • Cheddar cheese: Melted into the sauce, it’s the gooey backbone of this dish.
    • Breadcrumbs: Topping that turns crunchy and golden, adding texture.
    • Nutmeg: A pinch enhances the pumpkin’s sweetness.
    • Milk or cream: Creates a silky, smooth cheese sauce.
    • Olive oil: Roasts pumpkin and helps build flavor in the sauce.
    • Salt & pepper: Basic seasonings to balance sweetness and richness.

    Tools of the Trade for Pumpkin Mac and Cheese

    • Baking sheet: To roast the pumpkin evenly.
    • Large pot: For cooking the pasta.
    • Whisk: To make the cheese sauce smooth.
    • Baking dish: To bake the assembled dish.
    • Ladle or spoon: For mixing and serving.

    How to Make Pumpkin Mac and Cheese: Step-by-Step

    Step 1: Preheat your oven to 200°C (390°F).

    Step 2: Roast the pumpkin: cut into chunks, toss with olive oil, salt, and a pinch of nutmeg.

    Step 3: Bake for 25-30 minutes until caramelized and soft, then mash or puree.

    Step 4: Cook the pasta in salted boiling water until just al dente, about 8 minutes.

    Step 5: Make the cheese sauce: melt butter, whisk in flour, then slowly add milk, stirring constantly.

    Step 6: Add shredded cheese and pumpkin puree to the sauce, season with salt, pepper, and a dash of cayenne.

    Step 7: Combine the pasta with the sauce, transfer to a baking dish, top with breadcrumbs.

    Step 8: Bake uncovered for 15 minutes until bubbly and golden.

    Step 9: Let rest for 5 minutes before serving.

    Cooking Checkpoints & Tips

    • Pumpkin should be roasted until caramelized and soft, not mushy.
    • Cheese sauce should be silky; if lumpy, whisk more or blend briefly.
    • Breadcrumb topping needs a golden hue, not burnt.
    • Check pasta for al dente doneness—bite should have a slight resistance.

    Common Mistakes & How to Fix Them

    • Cheese sauce is lumpy.? Add more milk to smooth out a thick cheese sauce.
    • Pumpkin not roasting evenly.? Use a sharp knife to prevent uneven pumpkin chunks.
    • Breadcrumb topping turning dark too fast.? Lower oven temperature if breadcrumbs burn too quickly.
    • Pasta clumping.? Stir pasta immediately after draining to prevent sticking.

    Pumpkin Mac and Cheese

    This comforting dish features roasted pumpkin blended into a creamy cheese sauce, combined with tender pasta and topped with crispy breadcrumbs. The process involves roasting pumpkin, cooking pasta, and creating a silky cheese sauce, resulting in a hearty, golden-brown baked casserole with a smooth, cheesy interior and a crunchy topping.
    Prep Time 10 minutes
    Cook Time 45 minutes
    Total Time 55 minutes
    Servings: 4
    Course: Main Course
    Cuisine: American
    Calories: 520

    Ingredients
      

    • 1 small pumpkin peeled and cut into chunks
    • 8 oz uncooked pasta penne or macaroni work well
    • 2 tablespoons olive oil for roasting pumpkin
    • 2 cups milk or cream for a richer sauce
    • 2 cups shredded cheddar cheese preferably sharp for flavor
    • 2 tablespoons butter for the cheese sauce
    • 2 tablespoons flour to thicken the cheese sauce
    • 1/2 teaspoon nutmeg adds warmth and depth
    • 1/2 cup breadcrumbs for topping
    • 1 tablespoon olive oil to toast breadcrumbs

    Equipment

    • Baking sheet
    • Large pot
    • Whisk
    • Baking dish
    • Ladle or spoon

    Method
     

    1. Preheat your oven to 200°C (390°F) and line a baking sheet with parchment paper.
    2. Toss the pumpkin chunks with olive oil, a pinch of salt, and a sprinkle of nutmeg. Spread them evenly on the baking sheet.
    3. Roast the pumpkin for 25-30 minutes until caramelized and tender, then remove from the oven and mash or blend until smooth.
    4. While the pumpkin roasts, cook the pasta in a large pot of salted boiling water until just al dente, about 8 minutes. Drain and set aside.
    5. In the same pot, melt the butter over medium heat, then whisk in the flour and cook for 1-2 minutes until slightly golden and bubbling.
    6. Gradually pour in the milk, whisking constantly to create a smooth, thickened sauce.
    7. Stir in the shredded cheddar cheese and pumpkin puree, mixing until the cheese melts and the sauce is silky. Season with salt, pepper, and a pinch of nutmeg to taste.
    8. Combine the cooked pasta with the cheese and pumpkin sauce, stirring gently to coat evenly.
    9. Transfer the mixture to a baking dish. In a small bowl, toss breadcrumbs with olive oil and sprinkle evenly over the top.
    10. Bake uncovered for 15 minutes until bubbling and golden brown on top.
    11. Remove from oven and let rest for 5 minutes. Serve hot, enjoying the creamy, crispy-textured dish.

    Notes

    For extra flavor, add a dash of cayenne pepper or smoked paprika to the cheese sauce. To make it vegetarian, ensure your cheese is made without animal rennet.
    This dish isn’t just about comfort; it’s about embracing the season’s bounty with a bit of chaos and a lot of flavor. Feel free to tweak the cheese or spice levels—this is your cozy corner. Remember, your oven’s warmth and a good mash are what make it special. Have fun with it, and enjoy every spoonful.

  • Spooky-Savory Halloween Tacos: A Playful Twist on Comfort

    Spooky-Savory Halloween Tacos: A Playful Twist on Comfort

    Halloween is busy, and I love turning that chaos into something playful and edible. These tacos, with their mix of spooky shapes and familiar flavors, turn a simple dinner into a mini celebration. They’re a chance to get creative, especially with kids, who love building their own monstrous bites.

    Why I Keep Coming Back to These Tacos

    They’re simple, fun, and adaptable—perfect for spontaneous Halloween nights or quick weekday dinners. Every bite has a little chaos, a little comfort, and a lot of flavor. Plus, the joy of watching everyone build their own monstrous creations keeps the mood light and playful.

    Spook-tacular Ingredients and Their Secrets

    • Ground beef: I like it juicy, seasoned with cumin and chili powder—makes the flavor pop.: Can swap with ground turkey for a leaner twist, but adjust seasoning.
    • Corn tortillas: I prefer them warm, slightly crispy, with a hint of char—adds smoky flavor.: Gluten-free and versatile, you can try flour tortillas if you prefer softer bites.
    • Avocado: ripe and creamy, gives a cool contrast to spicy meat.: Skip if allergic, but try a dollop of sour cream instead.
    • Cheddar cheese: sharp, gooey, melts beautifully—adds richness.: Use pepper jack for extra spice or omit for dairy-free options.
    • Lime: brightens everything, a squeeze just before serving.: Lemon juice can substitute, but lime adds that authentic zing.

    Tools of the Spooky Trade

    • Skillet: For browning and cooking the seasoned meat.
    • Knife: Chopping toppings and prepping ingredients.
    • Tongs: Handling hot tortillas and assembling tacos.
    • Small bowls: Holding toppings for easy access.
    • Lime squeezer: Extracting fresh lime juice for a zing.

    Step-by-Step Guide to Halloween Tacos

    Step 1: Prepare your toppings: dice some avocado, shred cheese, and chop fresh cilantro. Set aside.

    Step 2: Cook the meat: in a skillet over medium heat (around 160°C/320°F), sauté seasoned ground beef until browned and fragrant, about 8 minutes.

    Step 3: Assemble the tacos: warm corn tortillas, then fill with meat, toppings, and a squeeze of lime for brightness.

    Step 4: Serve immediately: enjoy the crispy edges of the tortillas and gooey cheese while still hot, with extra lime wedges on the side.

    Cooking Checks and Tips for Perfect Halloween Tacos

    • Meat: ensure it’s browned and cooked through, no pink bits.
    • Tortillas: should be warm and slightly crispy around the edges.
    • Toppings: fresh and vibrant, not wilted or soggy.
    • Assembly: not overloaded to keep everything neat and easy to eat.

    Common Halloween Taco Troubles and How to Fix Them

    • Meat is dry and crumbly.? Add a splash of water if meat sticks or is too dry.
    • Tortillas are tough or cracking.? Wrap tortillas in foil and reheat if they crack or dry out.
    • Toppings falling apart.? Sprinkle extra cheese if toppings slide off.
    • Over-torched tortillas.? Reduce heat if tortillas burn quickly.

    Halloween Spooky Tacos

    These playful Halloween tacos combine seasoned ground beef with crispy, slightly charred corn tortillas, topped with creamy avocado, sharp cheddar cheese, and fresh lime juice. The dish features a fun, build-your-own presentation that turns a simple dinner into a festive miniature celebration, with textures ranging from crispy to gooey and vibrant flavors.
    Prep Time 10 minutes
    Cook Time 10 minutes
    Total Time 20 minutes
    Servings: 4
    Course: Main Course
    Cuisine: Mexican
    Calories: 350

    Ingredients
      

    • 1 lb ground beef preferably juicy and well-seasoned
    • 8 small corn tortillas preferably warmed and slightly crispy
    • 1 ripe avocado diced for topping
    • 1 cup cheddar cheese shredded
    • 1 lime lime for squeezing fresh juice
    • 1 tsp cumin for seasoning
    • 1 tsp chili powder adds flavor and spice

    Equipment

    • Skillet
    • Knife
    • Tongs
    • Small bowls
    • Lime squeezer

    Method
     

    1. Dice the avocado into small cubes and set aside in a small bowl.
    2. Shred the cheddar cheese and chop fresh cilantro if desired, then arrange them in small bowls for easy topping access.
    3. In a skillet over medium heat, add the ground beef and season with cumin and chili powder. Use tongs to break it apart as it cooks.
    4. Cook the meat until browned and fragrant, about 8 minutes, ensuring it’s cooked through with no pink remaining.
    5. While the meat cooks, warm the corn tortillas in a dry skillet or microwave until soft and slightly crispy around the edges.
    6. Once the meat is ready, turn off the heat and squeeze fresh lime juice over it to brighten the flavors.
    7. Lay out the warm tortillas and spoon some of the seasoned beef onto each one.
    8. Add diced avocado, sprinkle with shredded cheddar cheese, and garnish with cilantro if using.
    9. Finish by squeezing a little more lime juice over each taco for extra zing.
    10. Serve immediately while the tortillas are crispy and the cheese is gooey, with extra lime wedges on the side for squeezing.

    Notes

    For extra fun, use cookie cutters to shape tortillas into spooky shapes before filling. Keep a close eye on tortillas as they heat to prevent burning.
    These tacos are about embracing chaos and having fun with flavors. Feel free to add a splash of hot sauce or a dash of smoky paprika to make them uniquely yours. They’re perfect for a casual spooky night, where the whole table gets involved in building their own little monster bites. Keep it relaxed, keep it tasty, and let the kids and adults alike enjoy the messy, flavorful magic.

  • Spooky-Savory Halloween Tacos: A Playful Twist on Comfort

    Spooky-Savory Halloween Tacos: A Playful Twist on Comfort

    Halloween is busy, and I love turning that chaos into something playful and edible. These tacos, with their mix of spooky shapes and familiar flavors, turn a simple dinner into a mini celebration. They’re a chance to get creative, especially with kids, who love building their own monstrous bites.

    Why I Keep Coming Back to These Tacos

    They’re simple, fun, and adaptable—perfect for spontaneous Halloween nights or quick weekday dinners. Every bite has a little chaos, a little comfort, and a lot of flavor. Plus, the joy of watching everyone build their own monstrous creations keeps the mood light and playful.

    Spook-tacular Ingredients and Their Secrets

    • Ground beef: I like it juicy, seasoned with cumin and chili powder—makes the flavor pop.: Can swap with ground turkey for a leaner twist, but adjust seasoning.
    • Corn tortillas: I prefer them warm, slightly crispy, with a hint of char—adds smoky flavor.: Gluten-free and versatile, you can try flour tortillas if you prefer softer bites.
    • Avocado: ripe and creamy, gives a cool contrast to spicy meat.: Skip if allergic, but try a dollop of sour cream instead.
    • Cheddar cheese: sharp, gooey, melts beautifully—adds richness.: Use pepper jack for extra spice or omit for dairy-free options.
    • Lime: brightens everything, a squeeze just before serving.: Lemon juice can substitute, but lime adds that authentic zing.

    Tools of the Spooky Trade

    • Skillet: For browning and cooking the seasoned meat.
    • Knife: Chopping toppings and prepping ingredients.
    • Tongs: Handling hot tortillas and assembling tacos.
    • Small bowls: Holding toppings for easy access.
    • Lime squeezer: Extracting fresh lime juice for a zing.

    Step-by-Step Guide to Halloween Tacos

    Step 1: Prepare your toppings: dice some avocado, shred cheese, and chop fresh cilantro. Set aside.

    Step 2: Cook the meat: in a skillet over medium heat (around 160°C/320°F), sauté seasoned ground beef until browned and fragrant, about 8 minutes.

    Step 3: Assemble the tacos: warm corn tortillas, then fill with meat, toppings, and a squeeze of lime for brightness.

    Step 4: Serve immediately: enjoy the crispy edges of the tortillas and gooey cheese while still hot, with extra lime wedges on the side.

    Cooking Checks and Tips for Perfect Halloween Tacos

    • Meat: ensure it’s browned and cooked through, no pink bits.
    • Tortillas: should be warm and slightly crispy around the edges.
    • Toppings: fresh and vibrant, not wilted or soggy.
    • Assembly: not overloaded to keep everything neat and easy to eat.

    Common Halloween Taco Troubles and How to Fix Them

    • Meat is dry and crumbly.? Add a splash of water if meat sticks or is too dry.
    • Tortillas are tough or cracking.? Wrap tortillas in foil and reheat if they crack or dry out.
    • Toppings falling apart.? Sprinkle extra cheese if toppings slide off.
    • Over-torched tortillas.? Reduce heat if tortillas burn quickly.

    Halloween Monster Tacos

    These playful Halloween tacos feature seasoned ground beef nestled in warm, slightly crispy corn tortillas, topped with creamy avocado, sharp cheddar cheese, and fresh cilantro. The assembly process encourages creativity, making them perfect for a fun, spooky dinner that’s both tasty and visually appealing. The final dish offers a satisfying crunch combined with gooey cheese and vibrant toppings, creating a festive bite every time.
    Prep Time 15 minutes
    Cook Time 10 minutes
    Total Time 25 minutes
    Servings: 4
    Course: Main Course
    Cuisine: Mexican
    Calories: 350

    Ingredients
      

    • 1 lb ground beef or ground turkey for a leaner option
    • 8 small corn tortillas warm and slightly crispy
    • 1 ripe avocado diced for topping
    • 1 cup cheddar cheese shredded
    • 1 bunch cilantro chopped
    • 1 lime lime for squeezing
    • 1 teaspoon cumin for seasoning
    • 1 teaspoon chili powder for seasoning

    Equipment

    • Skillet
    • Knife
    • Tongs
    • Small bowls
    • Lime squeezer

    Method
     

    1. Dice the avocado into small cubes and set aside in a small bowl. Shred the cheddar cheese and chop the cilantro, placing each in separate small bowls for easy assembly.
    2. Heat a skillet over medium heat, adding a splash of oil if desired. Add the ground beef, breaking it apart with a spatula, and cook until browned and fragrant, about 8 minutes. Stir in cumin and chili powder, cooking for another minute to blend the flavors.
    3. While the meat cooks, wrap the corn tortillas in a damp towel and warm them in the microwave for about 30 seconds until soft and pliable. Then, place the skillet over medium-high heat and lightly toast the tortillas for about 1-2 minutes per side until they develop a slight char and crispy edges.
    4. Once the tortillas are crispy around the edges, remove them from the skillet and keep warm. Tongs work well for handling hot tortillas without tearing.
    5. Fill each tortilla with a generous spoonful of the seasoned beef, spreading it slightly to the edges. Top with a few cubes of avocado, then sprinkle with shredded cheddar cheese and chopped cilantro for vibrant color and flavor.
    6. Squeeze fresh lime juice over each taco just before serving to add brightness and balance the flavors. Serve immediately while the tortillas are crispy and the cheese is gooey.

    Notes

    For extra fun, use cookie cutters to shape the tortillas into spooky shapes before toasting. Feel free to add additional toppings like sour cream or hot sauce for more flavor. Keep an eye on the tortillas as they toast to prevent burning.
    These tacos are about embracing chaos and having fun with flavors. Feel free to add a splash of hot sauce or a dash of smoky paprika to make them uniquely yours. They’re perfect for a casual spooky night, where the whole table gets involved in building their own little monster bites. Keep it relaxed, keep it tasty, and let the kids and adults alike enjoy the messy, flavorful magic.

  • Halloween Quesadillas: A Spooky Snack with a Twist

    Halloween Quesadillas: A Spooky Snack with a Twist

    Halloween is a time for fun, and what better way to celebrate than with some spooky food? These quesadillas turn everyday ingredients into a playful, edible craft, perfect for kids and grown-ups alike. They’re quick, customizable, and just a little bit mischievous in flavor.
    What I love about this recipe is how it makes simple cheese and tortilla feel festive with a few tweaks. Plus, they’re so easy to customize—add more spice, more veggies, or even some sweet elements for a surprising twist. It’s a mess-free, delicious way to get into the spirit.

    Why I keep making these spooky bites

    They’re quick, versatile, and always a hit. Plus, the kids love the playful shapes and spicy surprises. It’s the perfect way to turn a simple snack into a mini Halloween craft. I never get tired of the crispy edges and cheesy pulls.

    Ingredient secrets for spooky success

    • Tortillas:: Soft, pliable, and perfect for crisping up. Whole wheat or corn work well, depending on your mood.
    • Cheese:: Mild, melty cheese like Monterey Jack or mozzarella—think gooey and stretchy.
    • Black bean mash:: Creamy, smoky, and a little spicy. Skip or swap with guacamole for a different vibe.
    • Jalapeños:: Fresh or pickled, they add that sharp, fiery bite—use less if you’re cautious.
    • Cooked chicken:: Shredded for easy layering. Leftovers work perfectly, or swap for sautéed mushrooms for veggie lovers.
    • Spooky shapes:: Use cookie cutters for fun Halloween silhouettes—think bats, ghosts, or pumpkins.

    Tools of the spooky trade

    • Skillet or non-stick frying pan: For even heat and crispy tortillas.
    • Cookie cutter or sharp knife: To cut fun Halloween shapes.
    • Spatula: Flip and handle hot quesadillas safely.
    • Cutting board: Prepare and rest the quesadilla slices.

    Step-by-step to a crispy, cheesy, spooky delight

    Step 1: Preheat your skillet to medium (around 160°C/320°F).

    Step 2: Lay your tortilla flat and spread a thin layer of black bean mash—think smoky and rich.

    Step 3: Add shredded cheese, and then layer slices of jalapeños and cooked chicken for a spicy kick.

    Step 4: Cover with another tortilla, press gently, and cook for about 3-4 minutes until golden and crispy.

    Step 5: Flip carefully, cook the other side for another 3 minutes, until cheese is melty and tortillas are crisp.

    Step 6: Use a spatula to check the underside—should be golden brown and smell toasty.

    Step 7: Remove from pan, let rest for a minute, then cut into spooky shapes with a cookie cutter.

    Crispy, cheesy, and spooky—what to watch for

    • Ensure your pan isn’t too hot to avoid burning the tortillas.
    • The cheese should be fully melted and gooey before flipping.
    • Look for a golden-brown color on both sides; that’s your cue to remove.
    • The quesadillas should feel firm but not hard—test by gently pressing.

    Troubleshooting spooky quesadillas

    • Burnt tortillas.? Lower the heat if tortillas burn too quickly.
    • Uneven melting cheese.? Use a spatula to gently press down while cooking.
    • Cheese not melting.? Add a splash of water and cover if the cheese isn’t melting.
    • Filling falling apart.? Flip carefully to prevent fillings from spilling out.

    Spooky Halloween Quesadillas

    These playful quesadillas combine soft, pliable tortillas with melty cheese, spicy jalapeños, smoky black bean mash, and shredded chicken for a fun, festive snack. Cooked until crispy and golden, they take on a satisfying texture with gooey cheese and crispy edges, shaped into spooky silhouettes for Halloween fun.
    Prep Time 10 minutes
    Cook Time 10 minutes
    Total Time 20 minutes
    Servings: 4
    Course: Main Course
    Cuisine: Mexican
    Calories: 350

    Ingredients
      

    • 4 pieces flour tortillas soft and pliable, about 8-inch diameter
    • 1/2 cup black bean mash creamy and smoky
    • 1 cup shredded Monterey Jack cheese melty and mild
    • 1/2 cup jalapeños sliced, fresh or pickled
    • 1 cup cooked chicken shredded, leftovers or sautéed

    Equipment

    • Skillet or non-stick frying pan
    • Cookie cutter or sharp knife
    • Spatula
    • Cutting board

    Method
     

    1. Preheat your skillet over medium heat until you can feel gentle warmth when holding your hand above it, and it starts to emit a soft sizzle.
    2. Lay one tortilla flat on a clean surface and spread a thin layer of black bean mash all over, covering most of the surface for a smoky base flavor.
    3. Sprinkle a generous handful of shredded Monterey Jack cheese evenly over the bean layer, allowing it to melt into the mash for gooeyness.
    4. Scatter slices of jalapeños over the cheese for a spicy kick, and then add shredded cooked chicken for protein and flavor.
    5. Place a second tortilla on top, gently pressing down to encourage the fillings to stick together and help the quesadilla hold its shape.
    6. Carefully transfer the assembled quesadilla to the preheated skillet and cook for about 3-4 minutes until the bottom turns golden brown and crispy, with the cheese beginning to melt and bubble.
    7. Use a spatula to flip the quesadilla gently and cook the other side for another 3 minutes, until it’s golden and crispy, with the cheese fully melted inside and filling heated through.
    8. Remove the quesadilla from the skillet and place it on a cutting board; let it rest for a minute to settle and cool slightly.
    9. Using a cookie cutter or sharp knife, cut out fun Halloween shapes—like bats, ghosts, or pumpkins—to add a festive touch.
    10. Arrange the shaped quesadillas on a serving platter and serve warm, allowing everyone to enjoy the crispy, cheesy, spicy bites with playful shapes.

    Notes

    Ensure heat is moderate to prevent burning; press gently when cooking to help cheese melt evenly; let quesadillas rest before cutting for cleaner shapes.
    These Halloween quesadillas are a playful way to turn simple ingredients into something fun and satisfying. They’re perfect for last-minute parties or a quick snack that feels special. Feel free to swap in different fillings or add a drizzle of sour cream to balance the heat. Keep it casual, and most importantly, enjoy the messy, cheesy goodness.

  • Halloween Quesadillas: A Spooky Snack with a Twist

    Halloween Quesadillas: A Spooky Snack with a Twist

    Halloween is a time for fun, and what better way to celebrate than with some spooky food? These quesadillas turn everyday ingredients into a playful, edible craft, perfect for kids and grown-ups alike. They’re quick, customizable, and just a little bit mischievous in flavor.
    What I love about this recipe is how it makes simple cheese and tortilla feel festive with a few tweaks. Plus, they’re so easy to customize—add more spice, more veggies, or even some sweet elements for a surprising twist. It’s a mess-free, delicious way to get into the spirit.

    Why I keep making these spooky bites

    They’re quick, versatile, and always a hit. Plus, the kids love the playful shapes and spicy surprises. It’s the perfect way to turn a simple snack into a mini Halloween craft. I never get tired of the crispy edges and cheesy pulls.

    Ingredient secrets for spooky success

    • Tortillas:: Soft, pliable, and perfect for crisping up. Whole wheat or corn work well, depending on your mood.
    • Cheese:: Mild, melty cheese like Monterey Jack or mozzarella—think gooey and stretchy.
    • Black bean mash:: Creamy, smoky, and a little spicy. Skip or swap with guacamole for a different vibe.
    • Jalapeños:: Fresh or pickled, they add that sharp, fiery bite—use less if you’re cautious.
    • Cooked chicken:: Shredded for easy layering. Leftovers work perfectly, or swap for sautéed mushrooms for veggie lovers.
    • Spooky shapes:: Use cookie cutters for fun Halloween silhouettes—think bats, ghosts, or pumpkins.

    Tools of the spooky trade

    • Skillet or non-stick frying pan: For even heat and crispy tortillas.
    • Cookie cutter or sharp knife: To cut fun Halloween shapes.
    • Spatula: Flip and handle hot quesadillas safely.
    • Cutting board: Prepare and rest the quesadilla slices.

    Step-by-step to a crispy, cheesy, spooky delight

    Step 1: Preheat your skillet to medium (around 160°C/320°F).

    Step 2: Lay your tortilla flat and spread a thin layer of black bean mash—think smoky and rich.

    Step 3: Add shredded cheese, and then layer slices of jalapeños and cooked chicken for a spicy kick.

    Step 4: Cover with another tortilla, press gently, and cook for about 3-4 minutes until golden and crispy.

    Step 5: Flip carefully, cook the other side for another 3 minutes, until cheese is melty and tortillas are crisp.

    Step 6: Use a spatula to check the underside—should be golden brown and smell toasty.

    Step 7: Remove from pan, let rest for a minute, then cut into spooky shapes with a cookie cutter.

    Crispy, cheesy, and spooky—what to watch for

    • Ensure your pan isn’t too hot to avoid burning the tortillas.
    • The cheese should be fully melted and gooey before flipping.
    • Look for a golden-brown color on both sides; that’s your cue to remove.
    • The quesadillas should feel firm but not hard—test by gently pressing.

    Troubleshooting spooky quesadillas

    • Burnt tortillas.? Lower the heat if tortillas burn too quickly.
    • Uneven melting cheese.? Use a spatula to gently press down while cooking.
    • Cheese not melting.? Add a splash of water and cover if the cheese isn’t melting.
    • Filling falling apart.? Flip carefully to prevent fillings from spilling out.

    Spooky Halloween Quesadillas

    These fun and festive quesadillas are made by layering melted cheese, spicy jalapeños, smoky black bean mash, and cooked chicken between tortillas, then crisped to golden perfection. Once cooked, they are cut into spooky shapes using cookie cutters, resulting in crispy, gooey bites perfect for celebrating Halloween with a playful twist.
    Prep Time 10 minutes
    Cook Time 10 minutes
    Total Time 20 minutes
    Servings: 4
    Course: Main Course
    Cuisine: Halloween
    Calories: 320

    Ingredients
      

    • 4 pieces tortillas whole wheat or corn
    • 1/2 cup black bean mash creamy and smoky
    • 1 cup shredded cheese Monterey Jack or mozzarella
    • 1/4 cup jalapeños sliced, fresh or pickled
    • 1 cup cooked chicken shredded

    Equipment

    • Skillet or non-stick frying pan
    • Cookie cutter or sharp knife
    • Spatula
    • Cutting board

    Method
     

    1. Preheat your skillet over medium heat until it feels warm and you start to smell toasty aromas.
    2. Lay a tortilla flat on a clean surface and spread a thin layer of black bean mash evenly across the surface, leaving a small border around the edges.
    3. Sprinkle a generous handful of shredded cheese over the bean mash, then evenly distribute slices of jalapeños and shredded chicken on top for added spice and flavor.
    4. Top with another tortilla, press down gently to help everything stick together, and carefully transfer to the hot skillet.
    5. Cook for about 3-4 minutes, or until the bottom is golden brown and crispy, with bubbling cheese visible around the edges.
    6. Flip the quesadilla carefully using a spatula, and cook for another 3 minutes until the other side is crispy and the cheese is fully melted.
    7. Once both sides are golden and crispy, remove the quesadilla from the pan and let it rest for a minute to settle.
    8. Use cookie cutters or a sharp knife to cut fun Halloween shapes—like bats, ghosts, or pumpkins—out of the quesadilla.
    9. Arrange the shaped quesadillas on a plate, and they’re ready to serve—crispy, cheesy, and full of festive flavor.

    Notes

    Feel free to customize with additional fillings like sautéed mushrooms or spicy salsa for extra flavor. Watch the heat to prevent burning, and enjoy the crispy, gooey goodness of these fun Halloween bites.
    These Halloween quesadillas are a playful way to turn simple ingredients into something fun and satisfying. They’re perfect for last-minute parties or a quick snack that feels special. Feel free to swap in different fillings or add a drizzle of sour cream to balance the heat. Keep it casual, and most importantly, enjoy the messy, cheesy goodness.

  • Halloween Quesadillas: A Spooky Snack with a Twist

    Halloween Quesadillas: A Spooky Snack with a Twist

    Halloween is a time for fun, and what better way to celebrate than with some spooky food? These quesadillas turn everyday ingredients into a playful, edible craft, perfect for kids and grown-ups alike. They’re quick, customizable, and just a little bit mischievous in flavor.
    What I love about this recipe is how it makes simple cheese and tortilla feel festive with a few tweaks. Plus, they’re so easy to customize—add more spice, more veggies, or even some sweet elements for a surprising twist. It’s a mess-free, delicious way to get into the spirit.

    Why I keep making these spooky bites

    They’re quick, versatile, and always a hit. Plus, the kids love the playful shapes and spicy surprises. It’s the perfect way to turn a simple snack into a mini Halloween craft. I never get tired of the crispy edges and cheesy pulls.

    Ingredient secrets for spooky success

    • Tortillas:: Soft, pliable, and perfect for crisping up. Whole wheat or corn work well, depending on your mood.
    • Cheese:: Mild, melty cheese like Monterey Jack or mozzarella—think gooey and stretchy.
    • Black bean mash:: Creamy, smoky, and a little spicy. Skip or swap with guacamole for a different vibe.
    • Jalapeños:: Fresh or pickled, they add that sharp, fiery bite—use less if you’re cautious.
    • Cooked chicken:: Shredded for easy layering. Leftovers work perfectly, or swap for sautéed mushrooms for veggie lovers.
    • Spooky shapes:: Use cookie cutters for fun Halloween silhouettes—think bats, ghosts, or pumpkins.

    Tools of the spooky trade

    • Skillet or non-stick frying pan: For even heat and crispy tortillas.
    • Cookie cutter or sharp knife: To cut fun Halloween shapes.
    • Spatula: Flip and handle hot quesadillas safely.
    • Cutting board: Prepare and rest the quesadilla slices.

    Step-by-step to a crispy, cheesy, spooky delight

    Step 1: Preheat your skillet to medium (around 160°C/320°F).

    Step 2: Lay your tortilla flat and spread a thin layer of black bean mash—think smoky and rich.

    Step 3: Add shredded cheese, and then layer slices of jalapeños and cooked chicken for a spicy kick.

    Step 4: Cover with another tortilla, press gently, and cook for about 3-4 minutes until golden and crispy.

    Step 5: Flip carefully, cook the other side for another 3 minutes, until cheese is melty and tortillas are crisp.

    Step 6: Use a spatula to check the underside—should be golden brown and smell toasty.

    Step 7: Remove from pan, let rest for a minute, then cut into spooky shapes with a cookie cutter.

    Crispy, cheesy, and spooky—what to watch for

    • Ensure your pan isn’t too hot to avoid burning the tortillas.
    • The cheese should be fully melted and gooey before flipping.
    • Look for a golden-brown color on both sides; that’s your cue to remove.
    • The quesadillas should feel firm but not hard—test by gently pressing.

    Troubleshooting spooky quesadillas

    • Burnt tortillas.? Lower the heat if tortillas burn too quickly.
    • Uneven melting cheese.? Use a spatula to gently press down while cooking.
    • Cheese not melting.? Add a splash of water and cover if the cheese isn’t melting.
    • Filling falling apart.? Flip carefully to prevent fillings from spilling out.

    Spooky Halloween Quesadillas

    These fun and festive quesadillas are made by layering melted cheese, spicy jalapeños, smoky black bean mash, and cooked chicken between tortillas, then crisped to perfection. Once golden and crispy, they’re cut into playful Halloween shapes, making them a delightful and customizable snack for all ages. The crispy edges and gooey interior create a satisfying texture that’s both fun and savory.
    Prep Time 10 minutes
    Cook Time 10 minutes
    Total Time 20 minutes
    Servings: 4
    Course: Main Course
    Cuisine: Mexican
    Calories: 350

    Ingredients
      

    • 4 pieces tortillas whole wheat or corn
    • 1/2 cup black bean mash creamy and smoky
    • 1 cup shredded cheese Monterey Jack or mozzarella
    • 1/2 cup jalapeños fresh or pickled, sliced
    • 1 cup cooked chicken shredded or chopped

    Equipment

    • Skillet or non-stick frying pan
    • Cookie cutter or sharp knife
    • Spatula
    • Cutting board

    Method
     

    1. Preheat your skillet over medium heat until it feels warm but not smoking, around 160°C (320°F).
    2. Lay a tortilla flat on a cutting board and spread a thin layer of black bean mash over half of it, covering the surface evenly.
    3. Sprinkle a generous handful of shredded cheese over the black bean mash, covering it completely for gooey meltiness.
    4. Add slices of jalapeños and a handful of cooked chicken on top of the cheese, distributing them evenly for balanced flavor.
    5. Place another tortilla on top, gently pressing down to help everything stick together and promote even crisping.
    6. Carefully lift the assembled quesadilla using a spatula and place it in the preheated skillet. Cook for about 3-4 minutes until the bottom is golden brown and crispy, and the cheese begins to melt.
    7. Gently flip the quesadilla using a spatula and cook the other side for another 3 minutes until equally crispy and the cheese is fully melted.
    8. Remove the quesadilla from the skillet and let it rest on a cutting board for a minute, allowing the cheese to set slightly.
    9. Using a cookie cutter or a sharp knife, cut fun Halloween shapes such as ghosts, bats, or pumpkins into the quesadilla.
    10. Arrange the shaped quesadillas on a plate and serve immediately, enjoying the crispy, cheesy, and spicy bites.
    These Halloween quesadillas are a playful way to turn simple ingredients into something fun and satisfying. They’re perfect for last-minute parties or a quick snack that feels special. Feel free to swap in different fillings or add a drizzle of sour cream to balance the heat. Keep it casual, and most importantly, enjoy the messy, cheesy goodness.

  • Halloween Lasagna: A Spooky Twist on Comfort Food

    Halloween Lasagna: A Spooky Twist on Comfort Food

    This Halloween, I wanted to do something playful yet satisfying—something that screamed spooky but tasted familiar. Lasagna is a perfect canvas for that, with its layers of cheese and sauce, but I added a few twists to make it feel a little more festive. It’s a dish that’s both fun to look at and even better to eat after a long day of costume chaos.

    Why This Halloween Lasagna Stays in My Mind

    It’s the messy, cheesy layers that remind me of childhood Halloweens, but with a grown-up twist. I love how it invites chaos in the kitchen and comfort in every bite. Plus, it’s endlessly customizable, perfect for any spooky gathering or quiet night craving carbs.

    Ingredients & Their Spooky Roles

    • Lasagna noodles: The backbone, sturdy enough to hold layers, but avoid overcooking to prevent mush.
    • Ricotta cheese: Creamy, mild base that balances the robust sauce and melts beautifully.
    • Spinach: Adds a pop of green and freshness, but swap with kale if you prefer a stronger bite.
    • Marinara sauce: Vivid and tangy, it’s the fiery heart of this dish; swap with roasted tomato sauce for smoky depth.
    • Mozzarella: Stringy, gooey, and melty—what’s a lasagna without it?
    • Parmesan: Sharp, salty topping that crisps up and adds a nutty punch.
    • Nutmeg: A pinch of this makes the ricotta sing, but skip if you dislike warm spice.

    Tools & Equipment for a Spooky Lasagna

    • Large pot: Boil noodles and cook vegetables.
    • Pan: Sauté aromatics and vegetables.
    • Mixing bowls: Combine cheese filling and prep ingredients.
    • Baking dish: Layer and bake the lasagna.
    • Aluminum foil: Cover during baking to prevent drying out.

    Step-by-Step for a Spook-tacular Lasagna

    Step 1: Preheat your oven to 180°C (350°F).

    Step 2: Cook the lasagna noodles according to package instructions until al dente, then drain and set aside.

    Step 3: In a pan, sauté chopped onion and garlic in olive oil until fragrant and translucent, about 5 minutes.

    Step 4: Mix ricotta cheese with chopped spinach, a pinch of nutmeg, and a beaten egg. Season with salt and pepper.

    Step 5: Spread a thin layer of marinara sauce in the bottom of a baking dish. Layer cooked noodles, cheese mixture, and more sauce, repeating until ingredients are used, ending with sauce on top.

    Step 6: Sprinkle shredded mozzarella and a handful of grated Parmesan over the top.

    Step 7: Cover with foil and bake for 25 minutes, then remove foil and bake another 10 minutes until bubbly and golden.

    Step 8: Let the lasagna rest for at least 10 minutes before slicing and serving.

    Cooking Checkpoints & Tips for Halloween Lasagna

    • Noodles should be cooked al dente, not mushy, to hold their shape during baking.
    • Sauce should be bubbling at the edges before removing foil, indicating it’s heated through.
    • Cheese should be melted and slightly browned on top, with a crackly crust forming.
    • Lasagna should be hot all the way through; use a thermometer to check if unsure.

    Common Mistakes & How to Fix Them

    • Lasagna is soggy or watery.? Use a sharper knife to cut clean slices, avoiding messy, torn edges.
    • Cheese is burnt or overly browned.? Let it rest before slicing to allow layers to set, keeping it tidy.
    • Noodles stick together or clump.? Cover with foil early if cheese starts to brown too quickly.
    • Too dry or overcooked noodles.? Make sure to stir and rinse noodles well to prevent sticking.

    Halloween Spooky Lasagna

    This festive lasagna features layers of al dente noodles, creamy ricotta cheese blended with spinach and nutmeg, and a rich marinara sauce, all topped with melty mozzarella and crispy Parmesan. Baked until bubbly and golden, it boasts a hearty, cheesy texture with vibrant green accents, perfect for a spooky celebration or a comforting night in.
    Prep Time 20 minutes
    Cook Time 35 minutes
    Total Time 55 minutes
    Servings: 8
    Course: Main Course
    Cuisine: Italian
    Calories: 420

    Ingredients
      

    • 12 pieces lasagna noodles cooked al dente
    • 15 oz ricotta cheese full-fat preferred
    • 2 cups fresh spinach chopped
    • 1 teaspoon nutmeg ground
    • 24 oz marinara sauce homemade or store-bought
    • 16 oz mozzarella cheese shredded
    • 1/2 cup Parmesan cheese grated
    • 1 large egg beaten
    • 1 medium onion chopped
    • 3 cloves garlic garlic cloves minced
    • 2 tablespoons olive oil
    • to taste salt and pepper

    Equipment

    • Large pot
    • Pan
    • Mixing bowls
    • Baking dish
    • Aluminum foil

    Method
     

    1. Cook the lasagna noodles in a large pot of boiling salted water until just al dente, about 8 minutes. Drain and set aside.
    2. In a pan, heat olive oil over medium heat. Add chopped onion and minced garlic, sauté until fragrant and translucent, about 5 minutes.
    3. Add chopped spinach to the pan and cook until wilted, about 2 minutes. Remove from heat and let cool slightly.
    4. In a mixing bowl, combine ricotta cheese, sautéed spinach mixture, beaten egg, ground nutmeg, and season with salt and pepper. Mix until smooth and well incorporated.
    5. Preheat your oven to 180°C (350°F). Spread a thin layer of marinara sauce in the bottom of a baking dish.
    6. Layer cooked noodles over the sauce, then spread a third of the ricotta mixture evenly on top. Repeat layers—noodles, sauce, ricotta—until all ingredients are used, finishing with a layer of sauce.
    7. Sprinkle shredded mozzarella evenly over the top layer, followed by grated Parmesan cheese.
    8. Cover the dish with aluminum foil and bake for 25 minutes. Remove the foil and bake for an additional 10 minutes, until the cheese is bubbly and golden brown.
    9. Take the lasagna out of the oven and let it rest for at least 10 minutes. This helps the layers set and makes slicing easier.
    10. Slice into squares, serve hot, and enjoy the cheesy, festive layers with a hint of green from the spinach for a spooky touch.
    This Halloween lasagna isn’t just about the spooky look; it’s about the cozy, cheesy layers that comfort and surprise. Feel free to swap in your favorite veggies or make it extra spicy with some red pepper flakes. The best part is how forgiving it is—just layer, bake, and enjoy the chaos of flavors. Make it your own, and let the kids or friends marvel at your edible haunted house.

  • Halloween Lasagna: A Spooky Twist on Comfort Food

    Halloween Lasagna: A Spooky Twist on Comfort Food

    This Halloween, I wanted to do something playful yet satisfying—something that screamed spooky but tasted familiar. Lasagna is a perfect canvas for that, with its layers of cheese and sauce, but I added a few twists to make it feel a little more festive. It’s a dish that’s both fun to look at and even better to eat after a long day of costume chaos.

    Why This Halloween Lasagna Stays in My Mind

    It’s the messy, cheesy layers that remind me of childhood Halloweens, but with a grown-up twist. I love how it invites chaos in the kitchen and comfort in every bite. Plus, it’s endlessly customizable, perfect for any spooky gathering or quiet night craving carbs.

    Ingredients & Their Spooky Roles

    • Lasagna noodles: The backbone, sturdy enough to hold layers, but avoid overcooking to prevent mush.
    • Ricotta cheese: Creamy, mild base that balances the robust sauce and melts beautifully.
    • Spinach: Adds a pop of green and freshness, but swap with kale if you prefer a stronger bite.
    • Marinara sauce: Vivid and tangy, it’s the fiery heart of this dish; swap with roasted tomato sauce for smoky depth.
    • Mozzarella: Stringy, gooey, and melty—what’s a lasagna without it?
    • Parmesan: Sharp, salty topping that crisps up and adds a nutty punch.
    • Nutmeg: A pinch of this makes the ricotta sing, but skip if you dislike warm spice.

    Tools & Equipment for a Spooky Lasagna

    • Large pot: Boil noodles and cook vegetables.
    • Pan: Sauté aromatics and vegetables.
    • Mixing bowls: Combine cheese filling and prep ingredients.
    • Baking dish: Layer and bake the lasagna.
    • Aluminum foil: Cover during baking to prevent drying out.

    Step-by-Step for a Spook-tacular Lasagna

    Step 1: Preheat your oven to 180°C (350°F).

    Step 2: Cook the lasagna noodles according to package instructions until al dente, then drain and set aside.

    Step 3: In a pan, sauté chopped onion and garlic in olive oil until fragrant and translucent, about 5 minutes.

    Step 4: Mix ricotta cheese with chopped spinach, a pinch of nutmeg, and a beaten egg. Season with salt and pepper.

    Step 5: Spread a thin layer of marinara sauce in the bottom of a baking dish. Layer cooked noodles, cheese mixture, and more sauce, repeating until ingredients are used, ending with sauce on top.

    Step 6: Sprinkle shredded mozzarella and a handful of grated Parmesan over the top.

    Step 7: Cover with foil and bake for 25 minutes, then remove foil and bake another 10 minutes until bubbly and golden.

    Step 8: Let the lasagna rest for at least 10 minutes before slicing and serving.

    Cooking Checkpoints & Tips for Halloween Lasagna

    • Noodles should be cooked al dente, not mushy, to hold their shape during baking.
    • Sauce should be bubbling at the edges before removing foil, indicating it’s heated through.
    • Cheese should be melted and slightly browned on top, with a crackly crust forming.
    • Lasagna should be hot all the way through; use a thermometer to check if unsure.

    Common Mistakes & How to Fix Them

    • Lasagna is soggy or watery.? Use a sharper knife to cut clean slices, avoiding messy, torn edges.
    • Cheese is burnt or overly browned.? Let it rest before slicing to allow layers to set, keeping it tidy.
    • Noodles stick together or clump.? Cover with foil early if cheese starts to brown too quickly.
    • Too dry or overcooked noodles.? Make sure to stir and rinse noodles well to prevent sticking.

    Spooky Halloween Lasagna

    This festive Halloween lasagna features layers of al dente noodles, creamy ricotta mixed with spinach, and rich marinara sauce, topped with gooey mozzarella and sharp Parmesan. Baked until bubbling and golden, it offers a playful yet satisfying twist on a classic comfort dish, perfect for spooky gatherings or a cozy night in.
    Prep Time 20 minutes
    Cook Time 35 minutes
    Total Time 55 minutes
    Servings: 8
    Course: Main Course
    Cuisine: Italian
    Calories: 450

    Ingredients
      

    • 12 pieces Lasagna noodles preferably fresh or al dente cooked
    • 15 oz Ricotta cheese full-fat for creaminess
    • 2 cups Fresh spinach chopped
    • 3 cups Marinara sauce vivid and tangy
    • 2 cups Mozzarella cheese shredded
    • 0.5 cups Parmesan cheese grated, for topping
    • 1 pinch Nutmeg adds warmth to ricotta
    • 1 clove Garlic minced
    • 1 medium Onion chopped
    • 2 tablespoons Olive oil
    • to taste Salt and pepper

    Equipment

    • Large pot
    • Pan
    • Mixing bowls
    • Baking dish
    • Aluminum foil

    Method
     

    1. Preheat your oven to 180°C (350°F). Gather all ingredients and set your baking dish nearby.
    2. Cook the lasagna noodles in a large pot of boiling salted water until just al dente, about 8-10 minutes. Drain and set aside, avoiding overcooking.
    3. In a pan, heat olive oil over medium heat. Add chopped onion and minced garlic, sauté until fragrant and translucent, about 5 minutes, filling your kitchen with a savory aroma.
    4. Stir chopped spinach into the pan, cooking until wilted, about 2 minutes. Remove from heat and let cool slightly.
    5. In a mixing bowl, combine ricotta cheese, sautéed spinach mixture, a pinch of nutmeg, and a beaten egg. Season with salt and pepper, then mix until smooth and well blended.
    6. Spread a thin layer of marinara sauce in the bottom of your baking dish to prevent sticking.
    7. Layer cooked noodles over the sauce, then spread a generous portion of the ricotta mixture over the noodles.
    8. Pour more marinara sauce over the cheese layer, then repeat the layering process—noodles, cheese, sauce—until all ingredients are used, finishing with a sauce layer on top.
    9. Sprinkle shredded mozzarella evenly over the top layer, then add grated Parmesan for a crispy, cheesy finish.
    10. Cover the dish with aluminum foil and bake for 25 minutes, until bubbly around the edges. Remove the foil and continue baking for an additional 10 minutes until golden and bubbling.
    11. Take the lasagna out of the oven and let it rest for at least 10 minutes. This allows the layers to set and makes slicing easier.
    12. Slice into squares, revealing the cheesy, layered interior with a slight crust on top. Serve hot and enjoy your spooky, cheesy Halloween lasagna!
    This Halloween lasagna isn’t just about the spooky look; it’s about the cozy, cheesy layers that comfort and surprise. Feel free to swap in your favorite veggies or make it extra spicy with some red pepper flakes. The best part is how forgiving it is—just layer, bake, and enjoy the chaos of flavors. Make it your own, and let the kids or friends marvel at your edible haunted house.

  • Halloween Lasagna: A Spooky Twist on Comfort Food

    Halloween Lasagna: A Spooky Twist on Comfort Food

    This Halloween, I wanted to do something playful yet satisfying—something that screamed spooky but tasted familiar. Lasagna is a perfect canvas for that, with its layers of cheese and sauce, but I added a few twists to make it feel a little more festive. It’s a dish that’s both fun to look at and even better to eat after a long day of costume chaos.

    Why This Halloween Lasagna Stays in My Mind

    It’s the messy, cheesy layers that remind me of childhood Halloweens, but with a grown-up twist. I love how it invites chaos in the kitchen and comfort in every bite. Plus, it’s endlessly customizable, perfect for any spooky gathering or quiet night craving carbs.

    Ingredients & Their Spooky Roles

    • Lasagna noodles: The backbone, sturdy enough to hold layers, but avoid overcooking to prevent mush.
    • Ricotta cheese: Creamy, mild base that balances the robust sauce and melts beautifully.
    • Spinach: Adds a pop of green and freshness, but swap with kale if you prefer a stronger bite.
    • Marinara sauce: Vivid and tangy, it’s the fiery heart of this dish; swap with roasted tomato sauce for smoky depth.
    • Mozzarella: Stringy, gooey, and melty—what’s a lasagna without it?
    • Parmesan: Sharp, salty topping that crisps up and adds a nutty punch.
    • Nutmeg: A pinch of this makes the ricotta sing, but skip if you dislike warm spice.

    Tools & Equipment for a Spooky Lasagna

    • Large pot: Boil noodles and cook vegetables.
    • Pan: Sauté aromatics and vegetables.
    • Mixing bowls: Combine cheese filling and prep ingredients.
    • Baking dish: Layer and bake the lasagna.
    • Aluminum foil: Cover during baking to prevent drying out.

    Step-by-Step for a Spook-tacular Lasagna

    Step 1: Preheat your oven to 180°C (350°F).

    Step 2: Cook the lasagna noodles according to package instructions until al dente, then drain and set aside.

    Step 3: In a pan, sauté chopped onion and garlic in olive oil until fragrant and translucent, about 5 minutes.

    Step 4: Mix ricotta cheese with chopped spinach, a pinch of nutmeg, and a beaten egg. Season with salt and pepper.

    Step 5: Spread a thin layer of marinara sauce in the bottom of a baking dish. Layer cooked noodles, cheese mixture, and more sauce, repeating until ingredients are used, ending with sauce on top.

    Step 6: Sprinkle shredded mozzarella and a handful of grated Parmesan over the top.

    Step 7: Cover with foil and bake for 25 minutes, then remove foil and bake another 10 minutes until bubbly and golden.

    Step 8: Let the lasagna rest for at least 10 minutes before slicing and serving.

    Cooking Checkpoints & Tips for Halloween Lasagna

    • Noodles should be cooked al dente, not mushy, to hold their shape during baking.
    • Sauce should be bubbling at the edges before removing foil, indicating it’s heated through.
    • Cheese should be melted and slightly browned on top, with a crackly crust forming.
    • Lasagna should be hot all the way through; use a thermometer to check if unsure.

    Common Mistakes & How to Fix Them

    • Lasagna is soggy or watery.? Use a sharper knife to cut clean slices, avoiding messy, torn edges.
    • Cheese is burnt or overly browned.? Let it rest before slicing to allow layers to set, keeping it tidy.
    • Noodles stick together or clump.? Cover with foil early if cheese starts to brown too quickly.
    • Too dry or overcooked noodles.? Make sure to stir and rinse noodles well to prevent sticking.

    Halloween Spooky Lasagna

    This festive lasagna features layers of al dente noodles, creamy ricotta mixed with spinach, and a tangy marinara sauce, all topped with gooey mozzarella and crispy Parmesan. The dish is assembled in a baking dish, baked until bubbling and golden, resulting in a cheesy, comforting casserole with a fun Halloween twist. Its layered appearance and cheesy texture make it a perfect centerpiece for spooky gatherings or cozy nights.
    Prep Time 20 minutes
    Cook Time 35 minutes
    Total Time 55 minutes
    Servings: 6
    Course: Main Course
    Cuisine: Italian-American
    Calories: 520

    Ingredients
      

    • 12 pieces lasagna noodles preferably no-boil or pre-cooked
    • 15 oz ricotta cheese full-fat recommended
    • 4 cups fresh spinach chopped
    • 3 cups marinara sauce vivid and tangy
    • 2 cups mozzarella cheese shredded
    • 0.5 cups Parmesan cheese grated
    • 1 pinch nutmeg optional, for flavor
    • 1 medium onion finely chopped
    • 3 cloves garlic minced
    • 2 tablespoons olive oil
    • to taste salt and pepper

    Equipment

    • Large pot
    • Pan
    • Mixing bowls
    • Baking dish
    • Aluminum foil

    Method
     

    1. Boil a large pot of water, then cook the lasagna noodles until al dente, as per package instructions. Drain and set aside.
    2. In a pan, heat olive oil over medium heat. Sauté chopped onion and minced garlic until fragrant and translucent, about 5 minutes.
    3. Add chopped spinach to the pan and cook until wilted, about 2-3 minutes. Remove from heat and let cool slightly.
    4. In a mixing bowl, combine ricotta cheese, cooled spinach mixture, a pinch of nutmeg, and a beaten egg. Season with salt and pepper, then mix until smooth and creamy.
    5. Spread a thin layer of marinara sauce in the bottom of a baking dish. Layer cooked noodles over the sauce, then spread a portion of the ricotta mixture over the noodles.
    6. Repeat layering with noodles, cheese mixture, and sauce until all ingredients are used, finishing with a layer of marinara sauce on top.
    7. Sprinkle shredded mozzarella and grated Parmesan evenly over the top layer of sauce.
    8. Cover the baking dish with aluminum foil and bake in a preheated oven at 180°C (350°F) for 25 minutes, until bubbling around the edges.
    9. Remove the foil and continue baking for an additional 10 minutes, until the cheese is melted, bubbly, and golden brown.
    10. Take the lasagna out of the oven and let it rest for at least 10 minutes. This helps the layers set and makes slicing easier.
    11. Slice into squares and serve hot, enjoying the cheesy, layered goodness with a spooky Halloween twist.
    This Halloween lasagna isn’t just about the spooky look; it’s about the cozy, cheesy layers that comfort and surprise. Feel free to swap in your favorite veggies or make it extra spicy with some red pepper flakes. The best part is how forgiving it is—just layer, bake, and enjoy the chaos of flavors. Make it your own, and let the kids or friends marvel at your edible haunted house.