Most people see sugar cookie frosting as just a sweet, flat topping, but I love thinking of it as a blank slate. It’s surprisingly adaptable, almost like a flavor sponge waiting for your creative tweaks. Whether you want a hint of citrus, a splash of vanilla, or a touch of spice, this frosting can handle it all.
I’ve spent years tinkering with different flavor infusions and textural tweaks—adding a little cream cheese here, a dash of lemon zest there. It’s honestly kind of addictive to see how a simple base can turn into something uniquely yours. Plus, it’s a decorating shortcut that doesn’t compromise on taste or visual charm.
This frosting isn’t just about decorating cookies; it’s about the joy of customizing and experimenting. It’s a small act of culinary play that makes baking feel fresh and personal. And let’s be real—sometimes the best ideas come when you’re just messing around in the kitchen, tasting as you go.
Focusing on the surprising versatility of sugar cookie frosting as a canvas for creative flavor tweaks and textural experiments, rather than just a simple sweet topping.
The story behind this recipe
- One rainy afternoon, I found myself craving something simple but with a little extra soul. I remembered how my grandmother’s frosting always had a whisper of vanilla and a silky smoothness that just made cookies feel special. That nostalgia pushed me to perfect my own version—less fuss, more flavor.
- This frosting became my go-to for last-minute cookie decorating when I wanted something that looked polished but still felt homey. It’s funny how a simple sweet can carry so much memory, turning a plain sugar cookie into a moment of connection with old friends or new. Honestly, it’s like edible nostalgia in every dollop.
- The secret was always in the balance—just enough butter to soften it, a splash of vanilla to warm it up, and a touch of powdered sugar to keep it bright. Whenever I make this, I think about how small tweaks can turn a basic recipe into a little celebration. That’s what keeps me coming back to it, again and again.
Key ingredients and tips
- Powdered sugar: I like how it dissolves smoothly into the butter, giving a silky texture. If yours feels grainy, sift it first.
- Butter: I use unsalted, room temp—makes mixing easier and creates a richer, melt-in-your-mouth frosting. Cold butter will stiffen the mix.
- Vanilla extract: I prefer pure vanilla for depth—sometimes I add a tiny splash of almond for a nutty twist that’s subtle but noticeable.
- Milk or cream: I add just enough to loosen the frosting without making it runny—aim for a spreadable, creamy consistency that holds its shape.
- Food coloring: I like gel colors—they’re vibrant without watering down the frosting. When colors look dull, add a tiny drop more gel.
- Salt: I pinch in a little to balance the sweetness and deepen the vanilla flavor. Skip it if you’re aiming for a super-clean, simple frosting.
- Lemon zest (optional): It adds a fresh brightness and a hint of citrus—use sparingly, or it can overpower the sweetness.
Spotlight on key ingredients
Powdered sugar:
- I like how it dissolves smoothly into the butter, giving a silky texture. If yours feels grainy, sift it first.
- Butter: I use unsalted, room temp—makes mixing easier and creates a richer, melt-in-your-mouth frosting. Cold butter will stiffen the mix.
- Vanilla extract: I prefer pure vanilla for depth—sometimes I add a tiny splash of almond for a nutty twist that’s subtle but noticeable.
Vanilla extract:
- Its warm, fragrant aroma is essential—it blooms in the frosting, making every bite smell like a bakery.
- Butter: The silky, melt-in-your-mouth quality depends on good butter. Slightly salted adds a gentle depth and balances sweetness.
- Food coloring: Gel colors are vivid and don’t thin out the frosting, but watch for dull hues—add more gel for vibrance.
Notes for ingredient swaps
- Dairy-Free: Swap butter for coconut oil or vegan margarine. Expect a slightly different richness and a hint of coconut aroma.
- Sugar Alternatives: Use powdered erythritol or monk fruit sweetener. These might alter the sweetness level and texture slightly.
- Milk Substitutes: Almond milk, oat milk, or soy milk work well. Keep an eye on the consistency; you might need a touch more or less.
- Flavor Boosts: Add a pinch of cinnamon or a splash of lemon juice for extra zing. These brighten the frosting but can change the overall flavor profile.
- Coloring: Use natural food colorings like beet juice or turmeric. They add gentle hues but may slightly tint the flavor.
- Vanilla Essence: Substitute with vanilla bean paste or imitation vanilla. The depth of flavor varies, so adjust to taste.
- Texture Variations: For a creamier frosting, mix in a teaspoon of Greek yogurt or cream cheese, but be aware it may soften the consistency.
Equipment & Tools
- Medium mixing bowl: To combine and beat ingredients smoothly.
- Spatula: For mixing and smoothing frosting.
- Whisk: To incorporate air and achieve fluffiness.
- Cake scraper or flat spatula: For smoothing the frosting on cookies.
Step-by-step guide to frosting
- Gather your equipment: a medium mixing bowl, a spatula, a whisk, and a flat spatula or cake scraper for smoothing. Have powdered sugar, unsalted butter, vanilla extract, and milk ready.
- In the bowl, beat the softened butter on medium speed for about 30 seconds until creamy and pale. This ensures a smooth base.
- Add the powdered sugar gradually, about 1/2 cup at a time, beating on low to prevent a sugar cloud. Once incorporated, increase to medium-high and beat for 2-3 minutes until fluffy.
- Pour in the vanilla extract. If you want a subtle flavor tweak, add a splash of almond or citrus zest now. Mix until well combined.
- Loosen the frosting with milk or cream, starting with 1 teaspoon. Add more if needed, one drop at a time, until the frosting reaches a spreadable consistency. It should be silky and hold gentle peaks.
- For vibrant color, add gel food coloring a tiny drop at a time, mixing thoroughly to achieve even hue. Avoid watery colors that thin the frosting.
- Once mixed, check the texture: it should be smooth, shiny, and easy to spread. If too stiff, add a few more drops of milk; if too runny, sift in a little more powdered sugar.
- Use immediately or cover tightly with plastic wrap. If refrigerating, let it come to room temperature and give it a quick stir before use.
- Finish by frosting cooled sugar cookies with a spatula or piping bag. For a polished look, smooth the surface with a cake scraper or the back of a spoon.
- Allow frosting to set for 15-20 minutes at room temperature before decorating further or stacking.
Use immediately or cover tightly and refrigerate. Let chilled frosting soften at room temp, then remix briefly before use. Finish by spreading or piping onto cooled cookies and smoothing for a polished look.
How to Know It’s Done
- Frosting is silky, not grainy or stiff.
- Color is vibrant and even without streaks.
- Frosting holds a gentle peak when spread or piped.
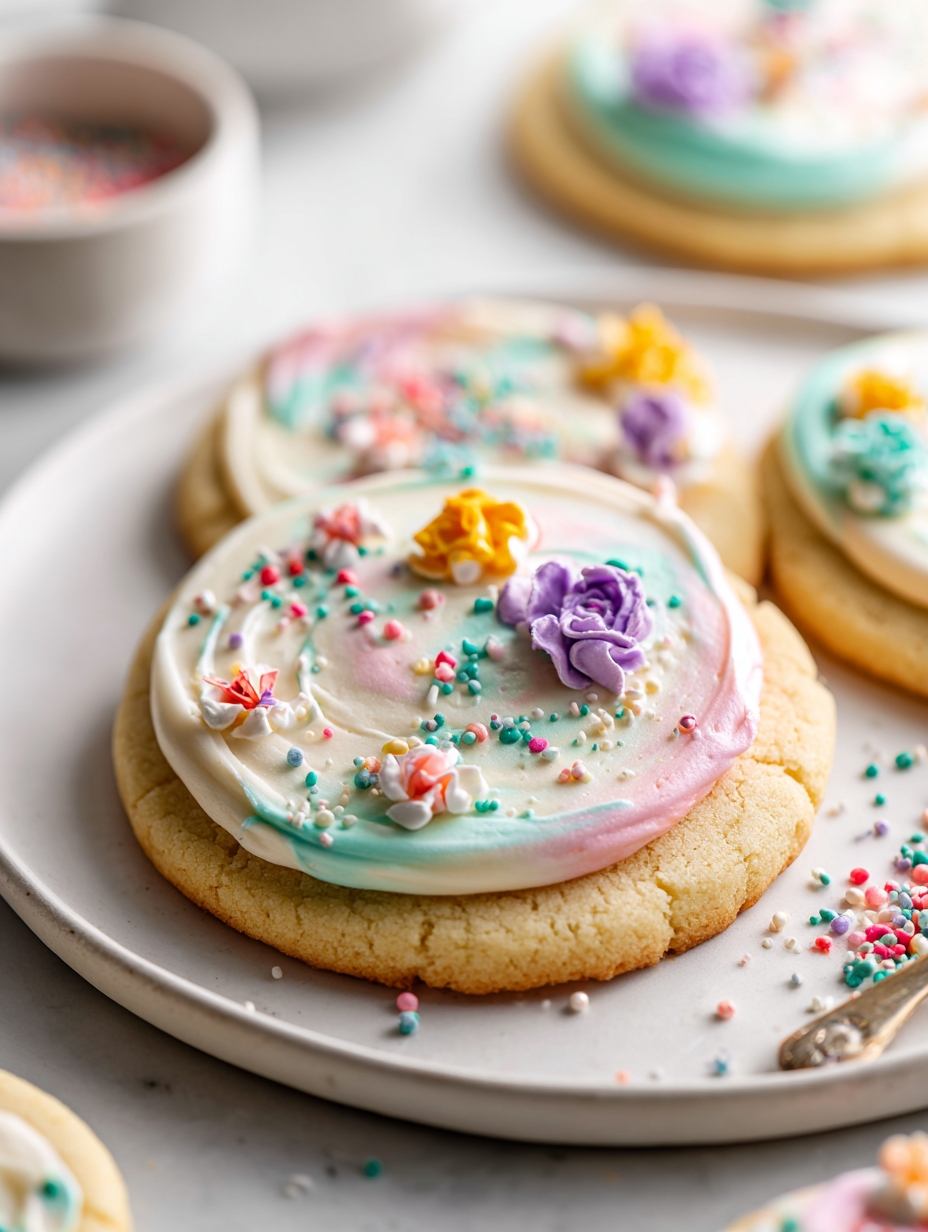
Customizable Sugar Cookie Frosting
Ingredients
Equipment
Method
- Place the softened butter in a medium mixing bowl and beat with a spatula or whisk for about 30 seconds until it's smooth and creamy.
- Add the sifted powdered sugar gradually, about half a cup at a time, mixing on low speed to prevent a cloud of sugar. Once incorporated, increase to medium-high and beat for 2-3 minutes until the mixture is light, fluffy, and silky.
- Pour in the vanilla extract and any optional flavor additions like lemon zest. Mix until the fragrance is fully incorporated and the frosting is smooth.
- Loosen the frosting by adding 1 teaspoon of milk or cream and mixing well. Check the consistency; if it’s still too stiff to spread smoothly, add more milk a few drops at a time until it reaches a creamy, spreadable texture that holds gentle peaks.
- If you want vibrant colors, add gel food coloring a tiny drop at a time, mixing thoroughly after each addition until you achieve your desired hue. The frosting should be glossy and smooth.
- Use the frosting immediately to decorate cookies with a spatula or piping bag. For a polished finish, smooth the surface with a cake scraper or flat spatula for an even, shiny look. Let the decorated cookies sit for 15-20 minutes to set before serving.
Notes
Pro tips for perfect frosting
- Bolded mini-head: Use room temperature butter to ensure a silky, smooth frosting that spreads easily.
- Bolded mini-head: Sift powdered sugar thoroughly to avoid grainy texture and achieve a velvety finish.
- Bolded mini-head: Add milk a teaspoon at a time, stopping when the frosting is creamy but firm enough to hold its shape.
- Bolded mini-head: Incorporate gel food coloring gradually to prevent thinning and to get vibrant, even hues.
- Bolded mini-head: For flavor depth, add a splash of vanilla or lemon zest early, allowing it to meld into the frosting.
- Bolded mini-head: Chill the frosting for 10-15 minutes if it feels too soft for piping, then remix briefly before decorating.
- Bolded mini-head: Use a spatula or palette knife for quick, smooth spreading, and avoid overworking the frosting to keep it fluffy.
Common mistakes and how to fix them
- FORGOT to sift powdered sugar before mixing—sift to avoid grainy frosting.
- DUMPED in too much milk at once—add gradually for perfect spreadability.
- OVER-TORCHED the frosting with high heat—use low speed and watch for glossy finish.
- MISSED the resting step—let frosting sit 10 minutes for better consistency and flavor meld.
Quick fixes and pantry swaps
- When frosting feels grainy, splash in a tiny bit more milk and beat again.
- If frosting cracks when spreading, patch it with a small dollop and smooth out.
- Splash a little vanilla or lemon juice if flavor feels dull after mixing.
- Dumped in too much food coloring? Shield with a pale layer of frosting and build up color gradually.
- When frosting hardens in the piping bag, rescue with a quick knead or warm water bath for 5 seconds.
Prep, store, and reheat tips
- Prepare the frosting a day ahead; it tastes even better once the flavors meld overnight, with a soft, buttery aroma.
- Store in an airtight container in the fridge for up to 3 days; the frosting firms up slightly, so stir well before using.
- For longer storage, freeze the frosting in a zip-top bag or container for up to a month. Thaw in the fridge and remix until smooth.
- Reheat chilled frosting gently at room temperature, stirring until it’s silky and spreadable, with a slight sheen and inviting vanilla scent.
Top questions about sugar cookie frosting
1. What are the key ingredients for good frosting?
Use powdered sugar and butter for a creamy, stable frosting that holds its shape well at room temp.
2. How do I get the right frosting texture?
Add milk gradually to reach a spreadable consistency; too much makes it runny, too little is stiff.
3. Can I use liquid food coloring?
Color with gel food coloring for vibrant, true hues without thinning the frosting.
4. How do I fix frosting that’s too soft to pipe?
Chill the frosting for 10-15 minutes if it’s too soft for piping; remix before decorating.
5. How can I make the frosting more flavorful?
Add a splash of vanilla or lemon zest for extra flavor and aroma that makes the frosting pop.
6. How long does frosting last in the fridge?
Store in an airtight container in the fridge for up to 3 days or freeze for longer storage.
7. What if my frosting turns grainy?
If frosting is grainy, sift the powdered sugar or add a tiny splash of milk and remix.
8. Why is my frosting lumpy or stiff?
Use room temperature butter for a silky, smooth frosting that spreads easily and looks shiny.
9. How can I adjust the frosting consistency?
For a thinner consistency, add a small amount of milk; for thicker, sift in more powdered sugar.
10. How do I prevent my frosting from becoming greasy?
Avoid overmixing once ingredients are combined to keep the frosting light and fluffy, not greasy.
Frosting might seem like just a finishing touch, but it’s really about the small details that bring cookies to life. When you whip up a batch, you’re not just decorating—you’re adding a personal touch that makes each treat a little more special.
And honestly, the joy comes from tweaking it to your taste—whether that’s a hint of vanilla, a splash of lemon, or a vibrant color. It’s a simple step, but one that turns plain sugar cookies into something memorable, season after season.

Hi, I’m Lucas Foster, the cook, writer, and everyday food enthusiast behind Totally in the Zone. This space is where my love for cooking meets my belief that food should fit into real life. Not rushed. Not overcomplicated. Just thoughtful, satisfying, and made with intention.