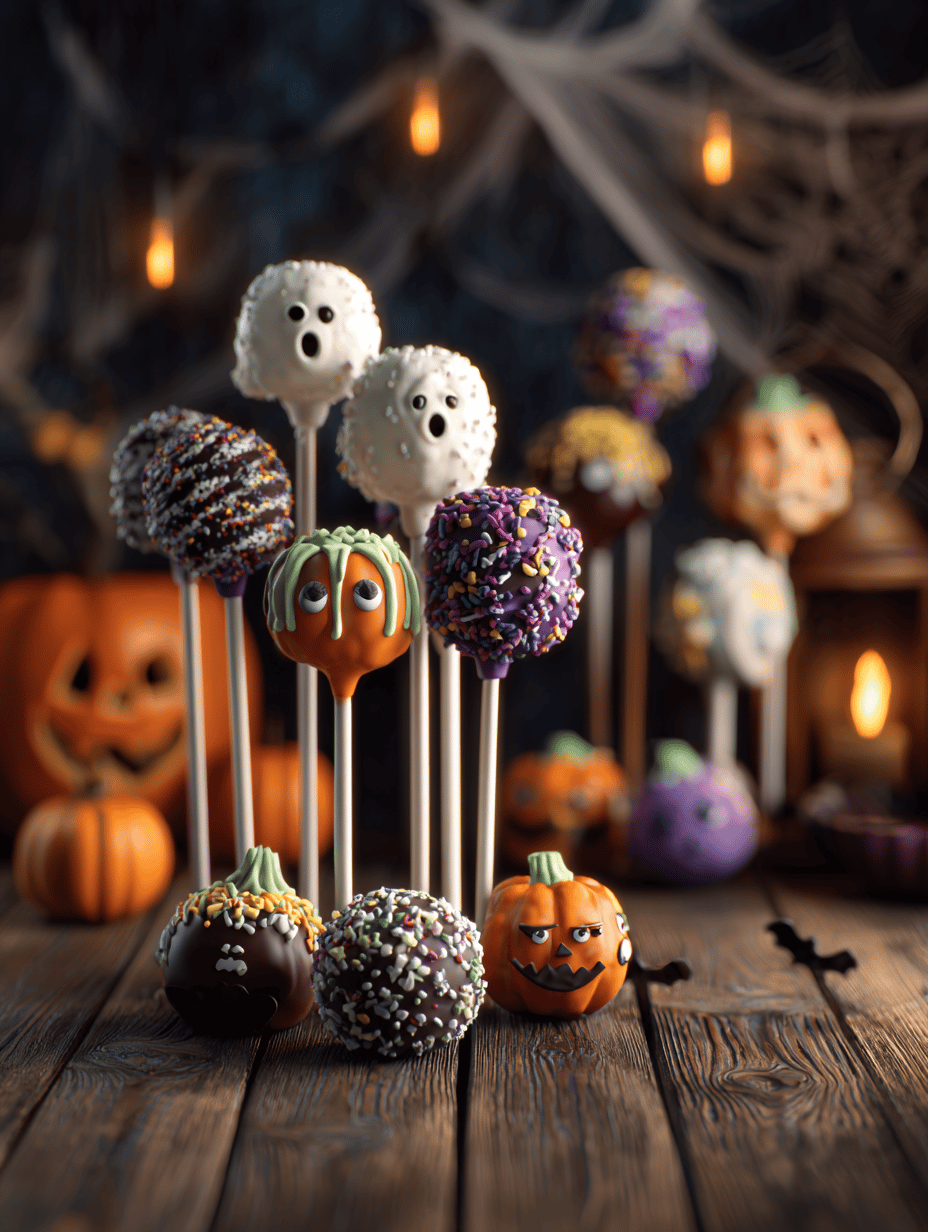
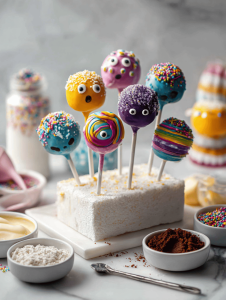
Cake pops are a fun way to turn cake into portable, bite-sized art. For Halloween, I love making them look creepy and playful, with a little extra spook factor. It’s chaotic but satisfying work, and everyone loves a creepy sweet on the table.
These little monsters are perfect for making with kids or friends, turning a simple cake into an event. Plus, they travel well, so I often bring a batch to fall gatherings, where they disappear fast.
Why These Halloween Cake Pops Are My Fall Favorite
They’re unpredictable—every batch turns out uniquely creepy or cute. The process is chaotic but rewarding, and the smile they bring makes all the mess worth it. Plus, decorating them with spooky details is oddly calming amid fall’s busy season.
Understanding Your Halloween Cake Pop Ingredients
- Cake crumbs: The base that holds everything together, using day-old cake works best.
- Frosting: Adds moisture and binds the mixture, but too much makes it greasy.
- Chocolate coating: The spooky shell, use good quality chocolate or candy melts.
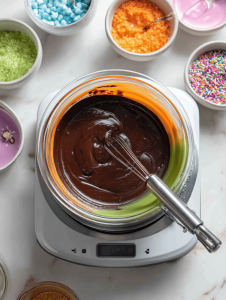
- Food coloring: Brighten up your coating or decoration with vibrant hues.
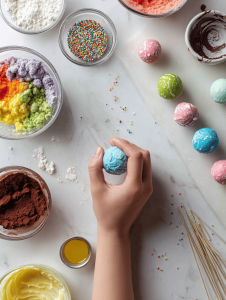
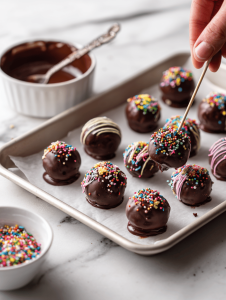
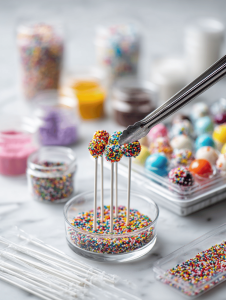
- Decorative sprinkles: Add a crunch and visual pop, choose themed sprinkles for extra fun.
- Cake pop sticks: Support for your bites, wooden or paper sticks work equally well.
- Edible glitter: For a magical shimmer, apply sparingly for a ghostly glow.
Tools You Need for Monster Cake Pops
- Cake mixer: To blend the cake ingredients smoothly.
- Silicone spatula: For mixing and scraping the bowl.
- Candy thermometer: To monitor chocolate temperature accurately.
- Styrofoam block: To hold the cake pops upright while decorating.
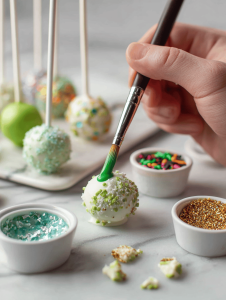
- Small paintbrush: For detailed decoration work.
Crafting the Perfect Spooky Bite
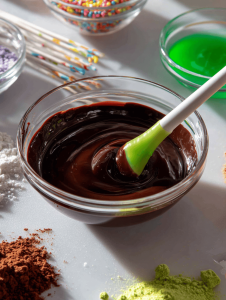
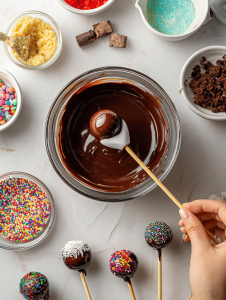
Step 1: Start by melting your chocolate in a heatproof bowl over simmering water, stirring until smooth.
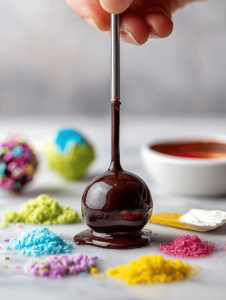
Step 2: Once melted, let it cool slightly, then dip the cake pop sticks into the chocolate for better adhesion.
Step 3: Insert the sticks into chilled cake balls, then freeze for at least 30 minutes to firm up.
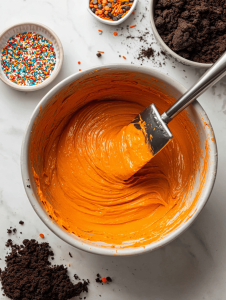
Step 4: Prepare your coating by melting more chocolate, adding food coloring, or cocoa powder for variety.
Key Tips for Halloween Cake Pops Success
- Ensure cake mixture is crumbly but holds together when rolled.
- Chill the cake balls before dipping to prevent melting or cracking.
- Use a gentle touch when coating to avoid cracks and uneven surfaces.
- Watch the chocolate temperature, too hot melts the coating and too cold causes streaks.
Avoid Common Pitfalls in Cake Pop Making
- Cake mixture too wet and crumbly.? If the cake mixture is too sticky, add a bit more crushed cookie or frosting.
- Cake balls falling off sticks.? Dip the sticks in chocolate before inserting to ensure they stay firm.
- Cracked or uneven coating.? Chill the coated pops if the chocolate starts to crack, for a smoother finish.
- Chocolate not setting properly.? Don’t rush the cooling—refrigerate longer if the coating isn’t setting.
Halloween Monster Cake Pops
Ingredients
Equipment
Method
- Place the cake crumbs in a large bowl and mix in the frosting with a silicone spatula until the mixture is crumbly but holds together when pressed.
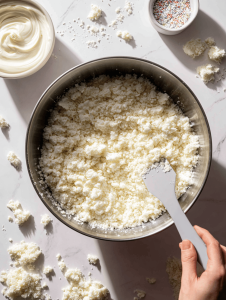
- Use your hands to roll the mixture into small, even balls about one inch in diameter, then set them on a lined tray.
- Chill the cake balls in the refrigerator for at least 30 minutes to firm up, making them easier to coat.
- Meanwhile, melt the chocolate in a heatproof bowl over simmering water, stirring until smooth and shiny. Use a candy thermometer to ensure the temperature stays around 105°F (40°C).
- Allow the melted chocolate to cool slightly, then dip the tip of each cake pop stick into the chocolate and insert it into a chilled cake ball, pressing gently to secure.
- Place the decorated cake balls back on the tray and freeze for another 30 minutes to ensure they are firm before coating.
- Reheat the remaining chocolate if needed, then divide it into bowls and stir in food coloring and sprinkles for spooky effects.
- Dip each frozen cake pop into the colored chocolate, swirling gently to cover completely, then place on a Styrofoam block to set.
- Use a small paintbrush to add edible glitter or detailed decorations for creepy eyes, mouths, or other spooky features.
- Allow the decorated cake pops to set completely at room temperature or in the refrigerator, about 15 minutes, until the coating is firm and shiny.
- Once set, display your creepy creations on a platter or in a fun container, ready to delight at your Halloween gathering.
Notes

Hi, I’m Lucas Foster, the cook, writer, and everyday food enthusiast behind Totally in the Zone. This space is where my love for cooking meets my belief that food should fit into real life. Not rushed. Not overcomplicated. Just thoughtful, satisfying, and made with intention.