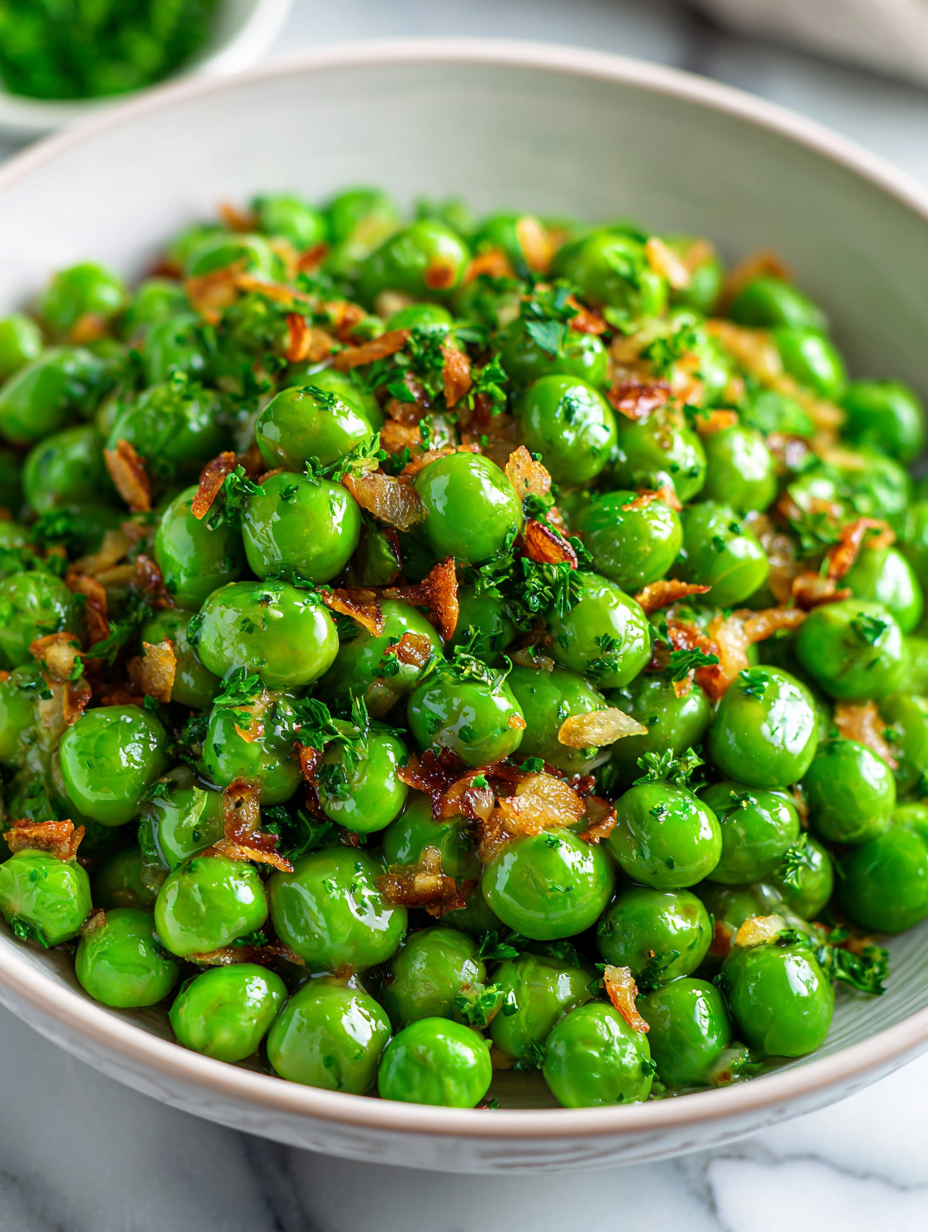
This butter garlic peas recipe is a tiny reminder that the simplest ingredients can shine on their own. I love how bright and fresh peas taste when kissed by rich butter and sharp garlic—no fuss, just pure flavor. It’s the kind of dish that feels cozy but still special enough for a quick weeknight dinner or a casual side.
Growing up, I was often drawn to the bright green glow of peas steaming in the pot. Over time, I started playing with those familiar flavors—adding extra garlic, a splash of lemon, or a pinch of chili—to elevate something so humble. Now, it’s become my go-to for when I need a quick, satisfying blast of fresh, buttery goodness that’s almost too simple to call a recipe.
This recipe is inspired by the quiet joy of rediscovering simple ingredients—peas, butter, garlic—highlighted in a way that elevates their humble presence, making everyday cooking feel like a small celebration.
The story behind this recipe
- This dish was born out of a lazy Sunday afternoon, when I had a bag of fresh peas and a craving for something simple yet satisfying. I wanted to create a side that celebrates the pure sweetness of peas, but with a buttery, garlicky punch. It’s become a little ritual to toss these ingredients together when I need a quick, comforting bite that feels a bit special.
- One memory that sticks out is a summer evening in my childhood — the smell of garlic sautéing in butter wafting through the kitchen, while the garden outside whispered. That aroma, so humble yet vivid, is what I chase every time I make this. It’s a reminder that the simplest ingredients, treated right, can evoke a sense of home and quiet joy.
- heading
- story_type
Key ingredients and tips
- Fresh peas: I love that pop of sweetness and bright color—use fresh or frozen, but fresh has that crisp snap I crave.
- Butter: I prefer unsalted for control, but salted works fine; it gives that rich, velvety mouthfeel with a hint of nutty aroma.
- Garlic: Thin slices release more flavor than minced—crisp and fragrant, it’s the backbone of this dish’s punch.
- Lemon zest (optional): Adds a zing that cuts through the richness—use a microplane for that fine, aromatic zest.
- Salt & pepper: I season generously at the end—don’t underestimate how much a pinch of salt brightens the sweetness of peas.
- Chili flakes (optional): A pinch for heat—add after cooking to keep that fiery pop and avoid burning.
- Olive oil (alternative): For a lighter touch, but it won’t have quite the same richness—best for a quick drizzle if butter isn’t available.
Spotlight on key ingredients
Peas:
- Fresh peas: I love that pop of sweetness and bright color—use fresh or frozen, but fresh has that crisp snap I crave.
- Butter: I prefer unsalted for control, but salted works fine; it gives that rich, velvety mouthfeel with a hint of nutty aroma.
- Garlic: Thin slices release more flavor than minced—crisp and fragrant, it’s the backbone of this dish’s punch.
Garlic:
- Butter: I prefer unsalted for control, but salted works fine; it gives that rich, velvety mouthfeel with a hint of nutty aroma.
- Thin slices release more flavor than minced—crisp and fragrant, it’s the backbone of this dish’s punch.
Notes for ingredient swaps
- Dairy-Free: Substitute butter with coconut oil or a good olive oil—both add richness, but coconut oil brings a slight tropical aroma.
- Vegan: Use plant-based butter or margarine—these will melt similarly but may lack the nutty depth of dairy butter.
- Salt Alternatives: Try using tamari or coconut aminos for a savory boost—note they add a different flavor profile and saltiness.
- Garlic Variations: Roasted garlic instead of raw—adds a mellow, caramelized sweetness but less pungency and punch.
- Peas: Swap for snap peas or snow peas—crispier texture, and they bring a fresh, slightly sweet flavor that’s more raw and bright.
- Lemon Zest: Lime zest or vinegar—use for a different citrus note or acidity, especially if you prefer a sharper or more floral aroma.
- Oil Instead of Butter: Use avocado or sesame oil—lighter or nuttier flavors, but may alter the dish’s richness and aroma.
Equipment & Tools
- Large skillet: Cook peas and garlic evenly, allowing space for stirring.
- Wooden spoon or spatula: Stir ingredients without damaging the pan or garlic.
- Measuring spoons: Accurately measure butter, garlic, and seasonings.
- Sharp knife and cutting board: Slice garlic thinly for maximum flavor release.
Step-by-step guide to butter garlic peas
- Gather your equipment: a large skillet (preferably non-stick), a wooden spoon or spatula, and a measuring spoon. You’ll also need a cutting board and a sharp knife for slicing garlic.
- Heat your skillet over medium heat (about 160°C / 320°F). Add 2 tablespoons of butter, letting it melt until it begins to foam and smell nutty, about 1-2 minutes.
- Add 3 cloves of thinly sliced garlic to the butter. Cook, stirring constantly, until fragrant and just starting to turn golden, about 30 seconds to 1 minute. Beware of burning garlic—if it smells acrid, reduce heat.
- Toss in 1 cup of fresh or frozen peas. Stir well to coat them in the garlic butter. Cook, stirring occasionally, until peas are tender and heated through, about 2-3 minutes. The peas should pop with a bright green color and a slight shimmer from the butter.
- Season with salt and freshly ground black pepper to taste. If using frozen peas, ensure they are heated through and slightly plump. If fresh, peas should be bright and tender with a slight snap when pressed.
- Finish with a squeeze of lemon juice or a sprinkle of lemon zest if desired, for a bright contrast. Toss gently to combine and then remove from heat.
- Transfer to a serving dish. Let rest for a minute to allow flavors to meld. Serve immediately, enjoying the tender peas coated in fragrant garlic butter with a hint of citrus.
Serve immediately while warm. A light sprinkle of flaky sea salt or lemon zest enhances the dish’s brightness. For best flavor, enjoy as soon as it’s ready—peas will lose their vivid color if left standing too long.
How to Know It’s Done
- Peas are bright green and tender, with a slight pop when pressed.
- Garlic is fragrant without burning, golden and aromatic.
- Butter has a nutty aroma and is well-coated on peas, not burnt.
Butter Garlic Peas
Ingredients
Equipment
Method
- Warm a large skillet over medium heat and add the butter, allowing it to melt and foam gently, filling the kitchen with a nutty aroma.
- Add the thinly sliced garlic to the skillet and cook, stirring constantly, until fragrant and just golden, about 30 seconds to 1 minute. You'll notice a beautiful aroma and the garlic will turn a light, toasted color.
- Toss in the peas, stirring well to coat them evenly in the garlic butter. Cook for about 2-3 minutes, until the peas are bright green and tender, with a slight pop when pressed.
- Season with salt and freshly ground black pepper to taste. If using, sprinkle chili flakes for a touch of heat, and stir to combine.
- Finish by adding lemon zest for a bright, citrusy note. Gently toss everything together and cook for another 30 seconds to meld flavors.
- Remove the skillet from heat and transfer the peas to a serving dish. Serve immediately, enjoying the tender peas coated in fragrant garlic butter with a hint of citrus and spice.
Pro tips for perfect butter garlic peas
- Bolded mini-head: Use thin garlic slices to maximize aroma and prevent burning—crisp and fragrant, they release flavor quickly.
- Bolded mini-head: Add peas only after butter is fully melted and bubbling—this keeps their bright color and crisp-tender texture.
- Bolded mini-head: Cook on medium heat—too high, and garlic burns; too low, and peas won’t develop that sweet, vibrant pop.
- Bolded mini-head: Stir constantly when adding garlic—this ensures even cooking and prevents sticking or scorching.
- Bolded mini-head: Finish with a quick squeeze of lemon—brightens the dish and balances the richness of butter.
- Bolded mini-head: Keep an eye on peas—remove from heat once they turn bright green and are just tender, to preserve freshness.
- Bolded mini-head: Use a wide skillet for even heat distribution—this helps peas cook uniformly and prevents overcrowding.
Common mistakes and how to fix them
- FORGOT to adjust heat → garlic burns easily, lower heat if garlic browns too quickly.
- DUMPED peas too early → cook until bright green and slightly tender, not mushy.
- OVER-TORCHED butter → remove pan from heat once butter is nutty and fragrant, avoid burning.
- SPLASHED too much water → keep peas dry for better flavor absorption and texture.
Fast fixes and pantry swaps
- If garlic burns, splash in a bit of cold water to stop the cooking.
- When peas look dull, add a splash of lemon juice for vibrancy.
- Splash a tiny bit of oil if butter is missing for a quick shine.
- Patch a burnt pan by deglazing with water, then scrub gently.
- Shield overcooked peas with a drizzle of fresh butter and a pinch of salt.
Prep, store, and reheat tips
- Peas can be prepped ahead—blanch fresh peas for 1-2 minutes, then drain and chill in the fridge for up to 24 hours. Frozen peas are ready to go, no prep needed.
- Garlic slices can be made up to a day in advance—store in an airtight container in the fridge to keep them crisp and fragrant.
- Butter can be melted and kept in a small jar at room temperature or in the fridge for a couple of days—use it straight from storage for best flavor.
- Refrigerate leftovers in an airtight container for up to 2 days. Reheat gently in a skillet over low heat, watching for aroma and slight shimmer from melted butter.
- Reheating will dull the bright green color and slightly soften peas—best enjoyed fresh, but warm gently to preserve flavor and texture.
Top questions about butter garlic peas
1. Can I use frozen peas instead of fresh?
Fresh peas are crisp and sweet, with a bright burst of flavor, especially when cooked quickly. Frozen peas are convenient and still retain much of that sweetness, but fresh peas have a more pronounced snap and aroma.
2. What kind of butter should I use?
Use unsalted butter for control over saltiness, but salted butter works fine—just reduce added salt slightly. For a dairy-free version, try coconut oil or olive oil, which add richness but different flavor notes.
3. How do I prevent garlic from burning?
Add garlic slices just as the butter melts and starts to foam; they cook quickly and should be fragrant and golden, not burnt. Burned garlic turns acrid and ruins the dish’s aroma.
4. How long should I cook the peas?
Cooking peas for about 2-3 minutes until bright green and tender is perfect. They should still have a slight pop when pressed and not look dull or mushy. Overcooking makes them lose their vibrancy.
5. When should I add lemon?
A squeeze of fresh lemon juice brightens the dish and balances the richness of the butter. Add it at the end to preserve that fresh, citrus aroma and avoid cooking off the zing.
6. How do I season the dish?
Adjust seasoning with salt and pepper last—taste and add gradually. Peas are naturally sweet, so a good pinch of salt enhances their flavor without overpowering.
7. Can I make this vegan?
For a vegan or dairy-free version, substitute butter with coconut oil or olive oil. They won’t replicate the exact richness but still add flavor and moisture.
8. How can I tell when peas are done?
Stir peas only until just tender and bright green. Overcooking makes them dull and mushy, while undercooking keeps them crisp and fresh. Taste to check doneness.
9. What if the garlic burns?
If garlic smells acrid or turns dark, remove the pan from heat immediately. Reduce heat and stir in peas quickly to prevent burning and preserve flavor.
10. How do I reheat leftovers?
Reheat leftovers gently in a skillet over low heat, adding a small knob of butter or a splash of water if needed. Expect slight color fade but retain flavor and aroma.
This butter garlic peas dish is a quietly satisfying reminder that simplicity has its own kind of magic. It’s perfect for those moments when fresh ingredients shine without fuss, and the kitchen smells of garlic and melting butter. Sometimes, the smallest recipes carry the biggest comfort, especially when they come together fast and taste so vivid.
In a world full of complex flavors, this one keeps things straightforward—green, buttery, with just a hint of garlic. It’s a little pocket of freshness that’s easy to toss together, yet somehow feels like a tiny celebration of everyday ingredients. That’s what makes it worth making over and over.

Hi, I’m Lucas Foster, the cook, writer, and everyday food enthusiast behind Totally in the Zone. This space is where my love for cooking meets my belief that food should fit into real life. Not rushed. Not overcomplicated. Just thoughtful, satisfying, and made with intention.