This Halloween bark is my go-to for a quick, no-fuss spooky treat. I love how versatile it is—using whatever candies or nuts I have lying around. It’s honestly more about the fun of decorating than perfect presentation. And it’s a hit with kids and grown-ups alike.
Why This Halloween Bark Keeps Calling Me Back
It’s a quick, satisfying project that always ends with a crunchy, chocolatey masterpiece. I love customizing toppings, making each batch unique. It’s my go-to for last-minute gifts or when I crave something sweet and spooky. Plus, the mess is part of the fun—kind of chaotic but totally worth it.
Ingredients Breakdown: What Makes It Work
- Dark chocolate: I prefer a good quality, 70% cocoa. It melts smoothly and has that deep, slightly smoky flavor.: The backbone of your bark, rich and velvety, with a bitter edge that balances sweet toppings.
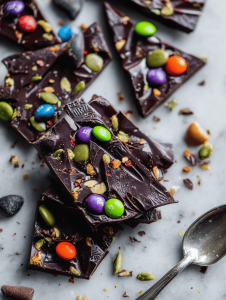
- Halloween candies: Use mini chocolates, candy corn, or gummy worms. They add color, crunch, and fun.: Colorful and playful, they make your bark visually spooky and tasty.
- Nuts or seeds: A handful of toasted pumpkin seeds or chopped pecans bring a savory crunch.: Ooze with roasted aroma and a bit of salt that cuts through the chocolate.
- Cookie crumbs: Oreos or graham crackers, crushed finely, add a crumbly texture.: A subtle sweetness and a crumbly contrast to the smooth chocolate.
- Sea salt: Just a pinch, to enhance flavors and add a little sparkle.: Brightens up the richness with a salty hit that’s not overpowering.
Tools & Equipment for a Smooth Setup
- Double boiler or microwave: To melt the chocolate gently without burning.
- Spatula: For spreading melted chocolate evenly.
- Baking sheet with parchment paper: To provide a sturdy base for setting and easy cleanup.
- Knife or breaker: To break the hardened bark into rustic pieces.
Step-by-Step: Crafting Your Halloween Bark
Step 1: Line a baking sheet with parchment paper. Keep it ready for spreading.
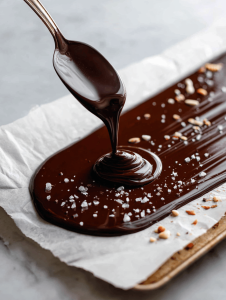
Step 2: Melt dark chocolate in a heatproof bowl over simmering water or in short bursts in the microwave, stirring often.
Step 3: Pour the melted chocolate onto the prepared sheet. Use a spatula to spread it into an even layer, about 1/4 inch thick.
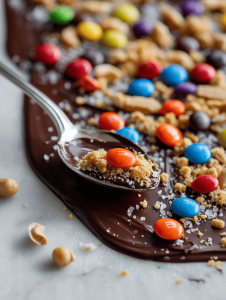
Step 4: Sprinkle Halloween-themed candies, crushed cookies, or nuts over the melted chocolate while still warm.
Step 5: Lightly press the toppings into the chocolate to help them stick.
Step 6: Let the bark cool at room temperature for about 30 minutes, or until set. For quicker setting, refrigerate for 15-20 minutes.
Step 7: Once hardened, break into irregular pieces with your hands or a knife.
Step 8: Store in an airtight container at room temperature for up to a week.
Cooking Checkpoints & Tips to Nail It
- Chocolate should be fully melted and smooth, not grainy or thick.
- Toppings need to be pressed into the chocolate so they don’t fall off.
- Bark should be firm but not brittle when cooled. Test a small piece.
- If the chocolate cracks too easily, it’s over-cooled. Bring it back to room temp and try again.
Common Mistakes and How to Fix Them
- Chocolate seizes or burns during melting.? Use a low heat and stir constantly to prevent burning.
- Toppings fall off easily.? Gently press toppings into the chocolate for better adhesion.
- Bark cracks or shatters when breaking.? Cool at room temp or slightly warm to avoid cracks.
- Chocolate becomes grainy and dull.? Don’t over-melt; remove from heat once smooth.

Halloween Chocolate Bark
Ingredients
Equipment
Method
- Line a baking sheet with parchment paper and set it aside.

- Break the dark chocolate into smaller pieces and melt it gently in a double boiler or microwave, stirring frequently until smooth and glossy.

- Pour the melted chocolate onto the prepared baking sheet and use a spatula to spread it into an even layer about 1/4 inch thick.
- Sprinkle your festive candies, crushed cookies, and toasted nuts evenly over the warm chocolate, pressing them gently into the surface.
- Sprinkle a pinch of sea salt over the toppings to enhance the flavors and add a touch of sparkle.
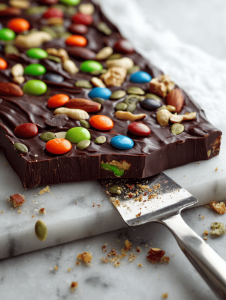
- Allow the bark to cool at room temperature for about 30 minutes, or refrigerate for 15-20 minutes until fully set and firm.
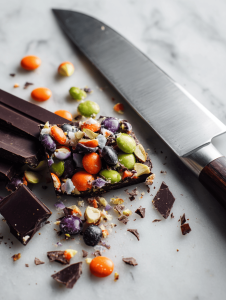
- Once cooled and hardened, gently break the bark into rustic, irregular pieces using your hands or a knife.
- Arrange the pieces on a serving platter or store in an airtight container at room temperature to enjoy over the week.
Notes

Hi, I’m Lucas Foster, the cook, writer, and everyday food enthusiast behind Totally in the Zone. This space is where my love for cooking meets my belief that food should fit into real life. Not rushed. Not overcomplicated. Just thoughtful, satisfying, and made with intention.